Christmas Eve Wishes CAL - Week One
UPDATE: This pattern is now available to buy as an advert free pdf download. The pattern includes all six parts of the original CAL in one document. It is available in UK and US terms. You can find it in my shop here.
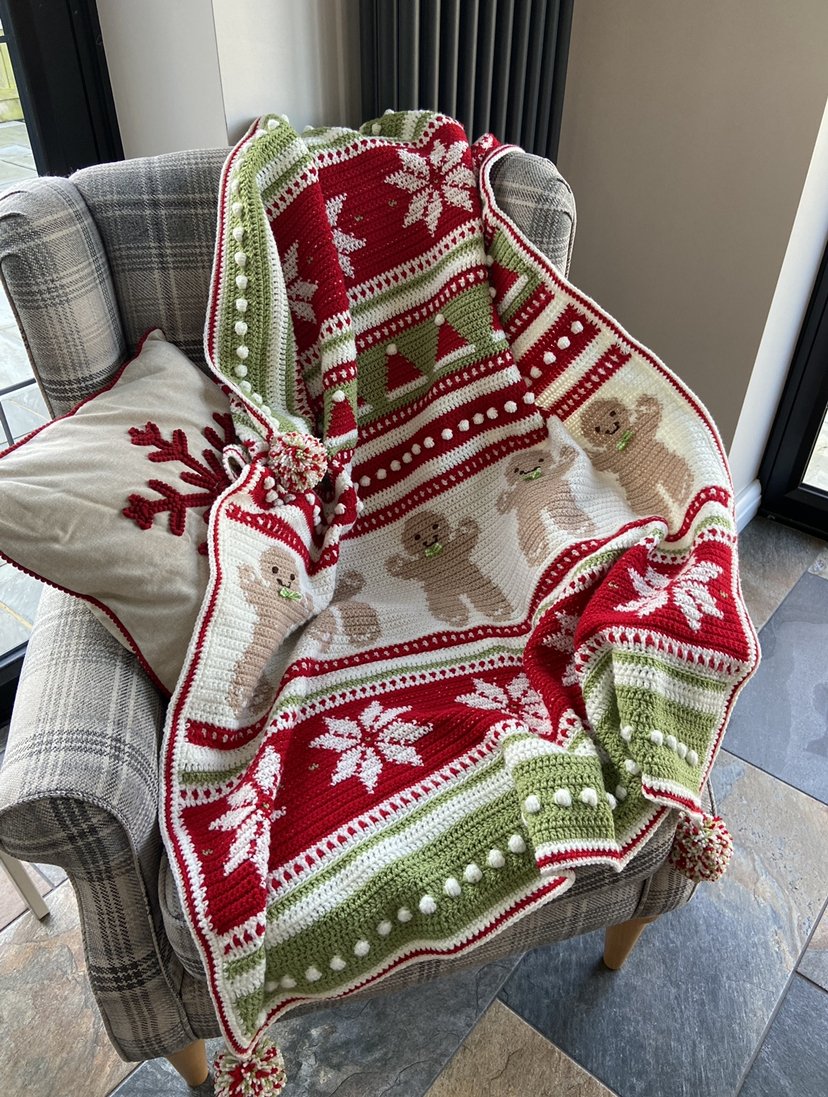
Today is finally the day. Christmas Eve Wishes is here! I am so excited to be able to share this with you all. I would like to say a huge thank you to the lovely people at Sirdar for having me as a guest CAL.
If you have just found this CAL and haven’t seen any of the buildup posts, I will link them for you below:
Click here to read my CAL Introduction post. This has all the information you need to know such as dates and materials required. This post also includes links to buy yarn packs.
Click here to read FAQs. In this post I have gathered together questions I have been asked about the CAL. You can find instructions to make the blanket larger or smaller here too.
Week One is a nice gentle start to ease you into it. By the end of this week you will have learned 3 out of the 4 repeating elements in the pattern. All that’s left to learn is the tapestry crochet and we will cover that in week 2. After that there are no new stitches, so you can relax and enjoy the rest of the CAL.

TIP OF THE WEEK
Make sure your foundation chain is not too tight. If your chain to too tight, the bottom edge of your blanket will be curved and this is impossible to fix later.
Your chain should measure approximately 90cm when laid out, unstretched. If your chain is significantly shorter, try using a larger hook size to achieve a looser chain.
Ok, lets go!
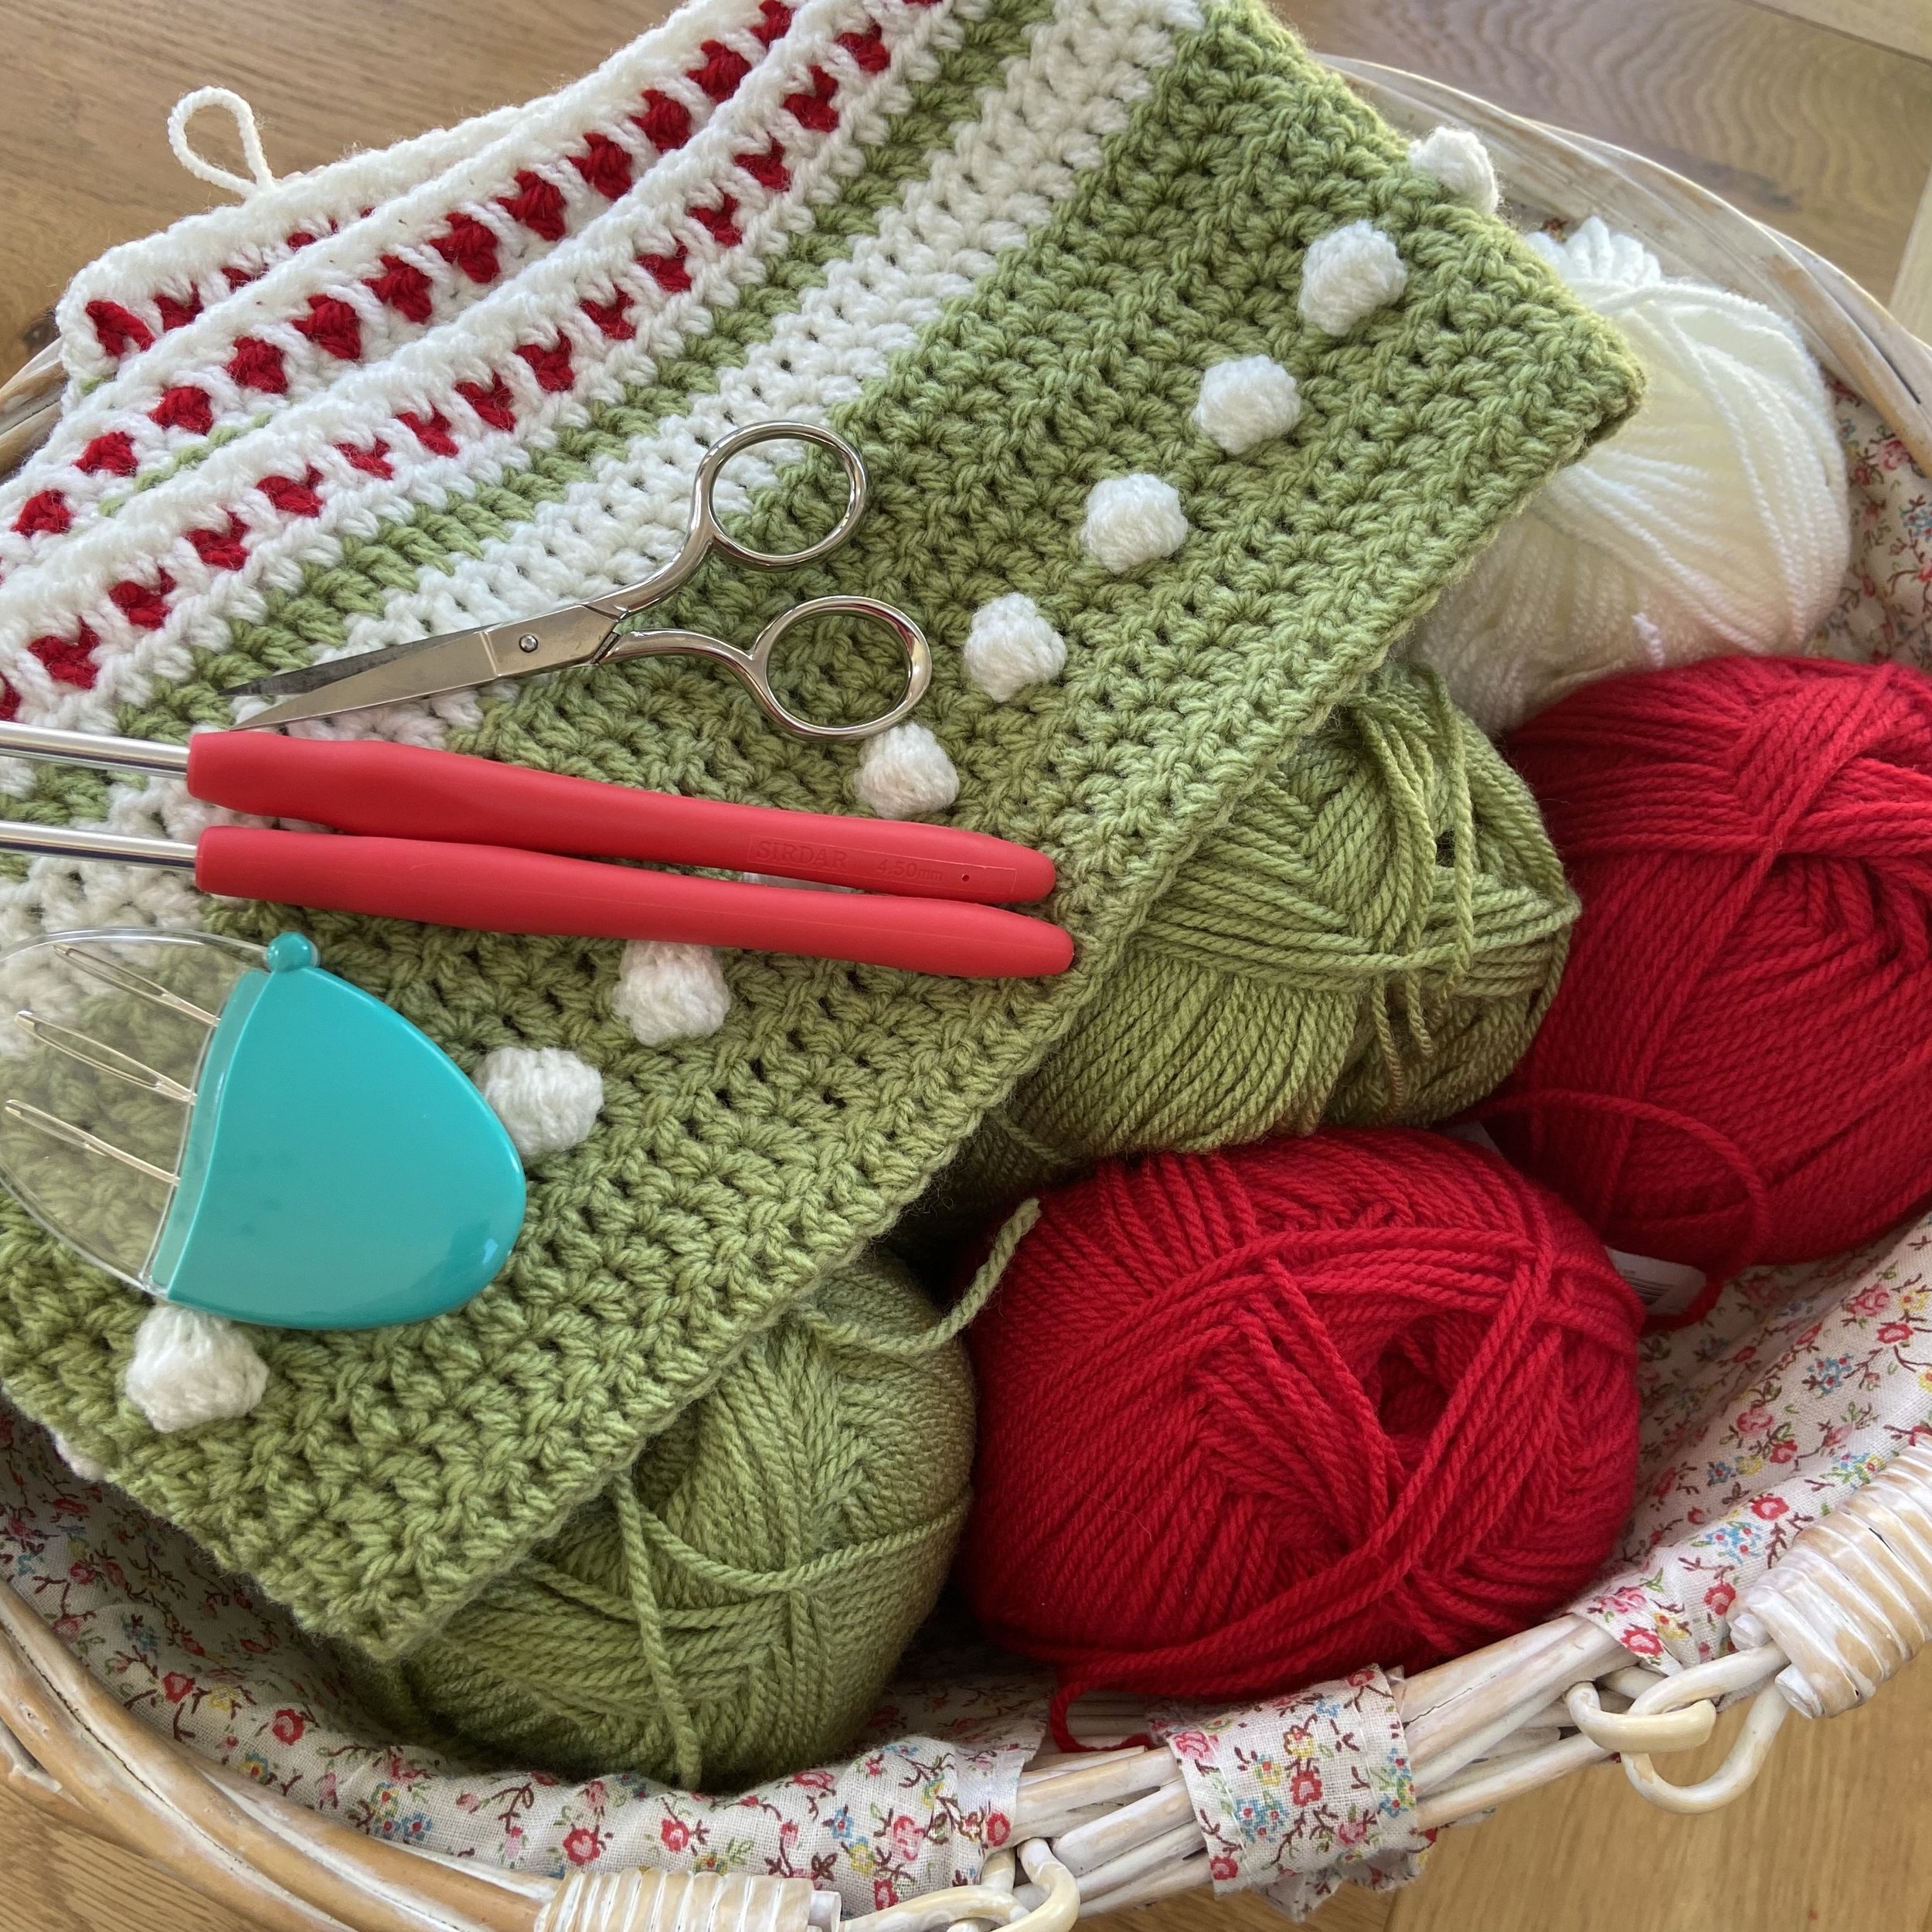
You will need:
Sirdar Hayfield Bonus DK 100g

3 x Cream (B)
3 x Ladybird* (C)
2 x Moss Green (A)
1 x Oatmeal (D)
*I used 190g of Ladybird, but if your tension is looser than mine, you may need a little more. To avoid disappointment, I suggest having an extra ball to hand.
Hayfield Bonus yarn packs available from:
Sirdar.com
A few metres of dark brown to embroider the faces on the gingerbread people.
1 metre of ribbon for the bows on the gingerbread people. I used 1cm wide gingham ribbon, but you can crochet these if you prefer.
4mm hook
4.5mm hook. Rows with colour changes tend to be a little tighter than single-colour rows. Changing to a larger hook will keep your tension even and edges completely straight.
Yarn needle
Scissors
Gauge: Gauge is not too important for this blanket as long as your tension is consistent throughout. Changing hook size when indicated will really help with that.
Finished Size: 100cm x 125cm (39.5” x 50”)
Stitch Terms:
This pattern is written in UK terms. These are the stitches/terms you will need to be familiar with before you begin. There is an alternative version to download, written in US terms.
ch - chain
tr - treble crochet
htr - half treble crochet
dc - double crochet
sk - skip
ss - slip stitch
st/s - stitch/es
yo – yarn over
[ ] – Square brackets mean the instruction inside them is repeated.
Helpful Tips and Information
It’s a good idea to read through the whole pattern section before you begin.
There are videos to help you if you need it. You can find them YOUTUBE LINK
This stitch count for EVERY row is always 150 stitches.
A chain 2 at the start of a row DOES count as a stitch.
A chain 1 at the start of a row DOES NOT count as a stitch.
The blanket is worked back and forth in rows and in one piece. This means there is no joining/ sewing together at the end.
Week one - Stripes and bobbles

This is what we will be working on this week. I’ve given detailed instructions for all of these rows, and they will all be repeated at various points in the blanket.


Foundation Chain: Using A and a 4mm hook, 152 ch.
Row 1: 1 tr in 4th ch from hook. 1 tr in each ch across. 2 ch, turn. 150 sts.
1. The needle shows where to put your first treble.
2. This shows the first treble completed and the 3 skipped chains. This counts as 2 trebles.
3. Check you have 150 stitches before moving on. From now on, the stitch count for every row will be 150.

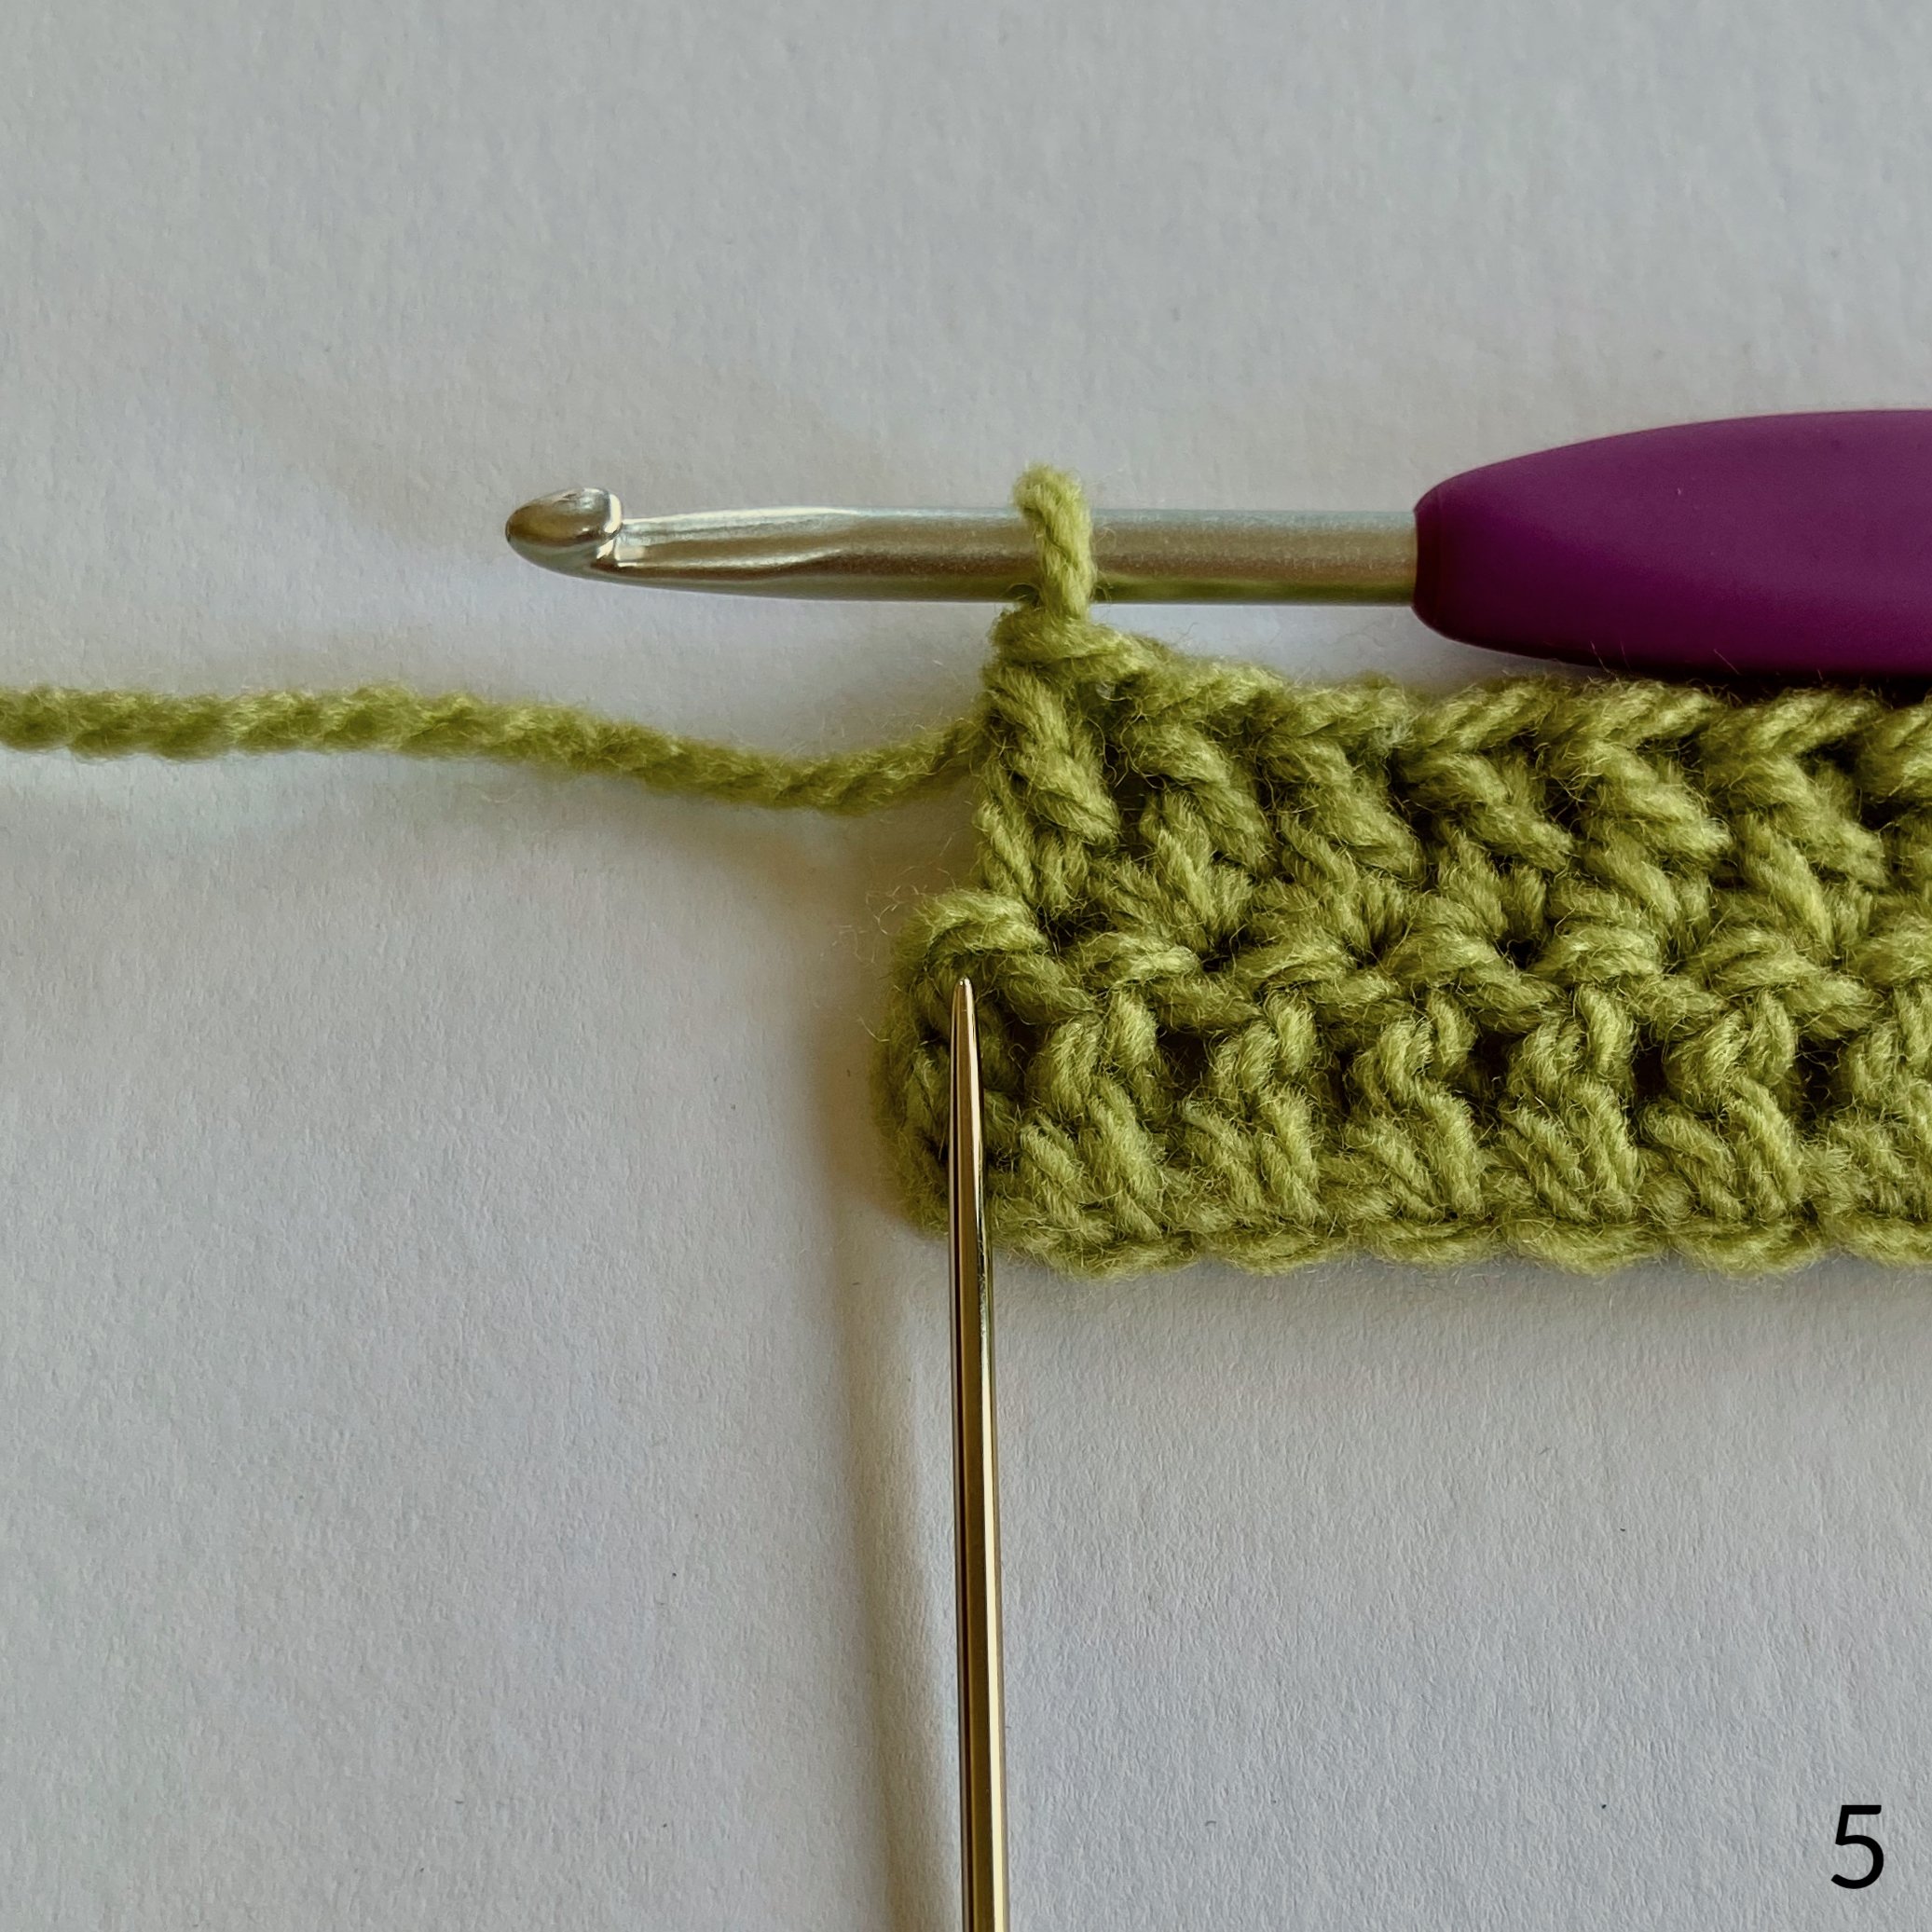

Row 2: (The 2 ch counts as the first stitch). Sk the first st and 1 tr in each st across. 2 ch, turn.
4. The needle is pointing to where you put your first treble.
5. The last stitch in the row is a little tricky to see. The needle is pointing to where it goes.
Row 3: Repeat row 2
Row 4: (The 2 ch counts as the first stitch). Sk the first st and 1 tr in each st across. 1 ch, turn.
6. It’s a good idea to count your stitches before moving on to make sure you still have 150.

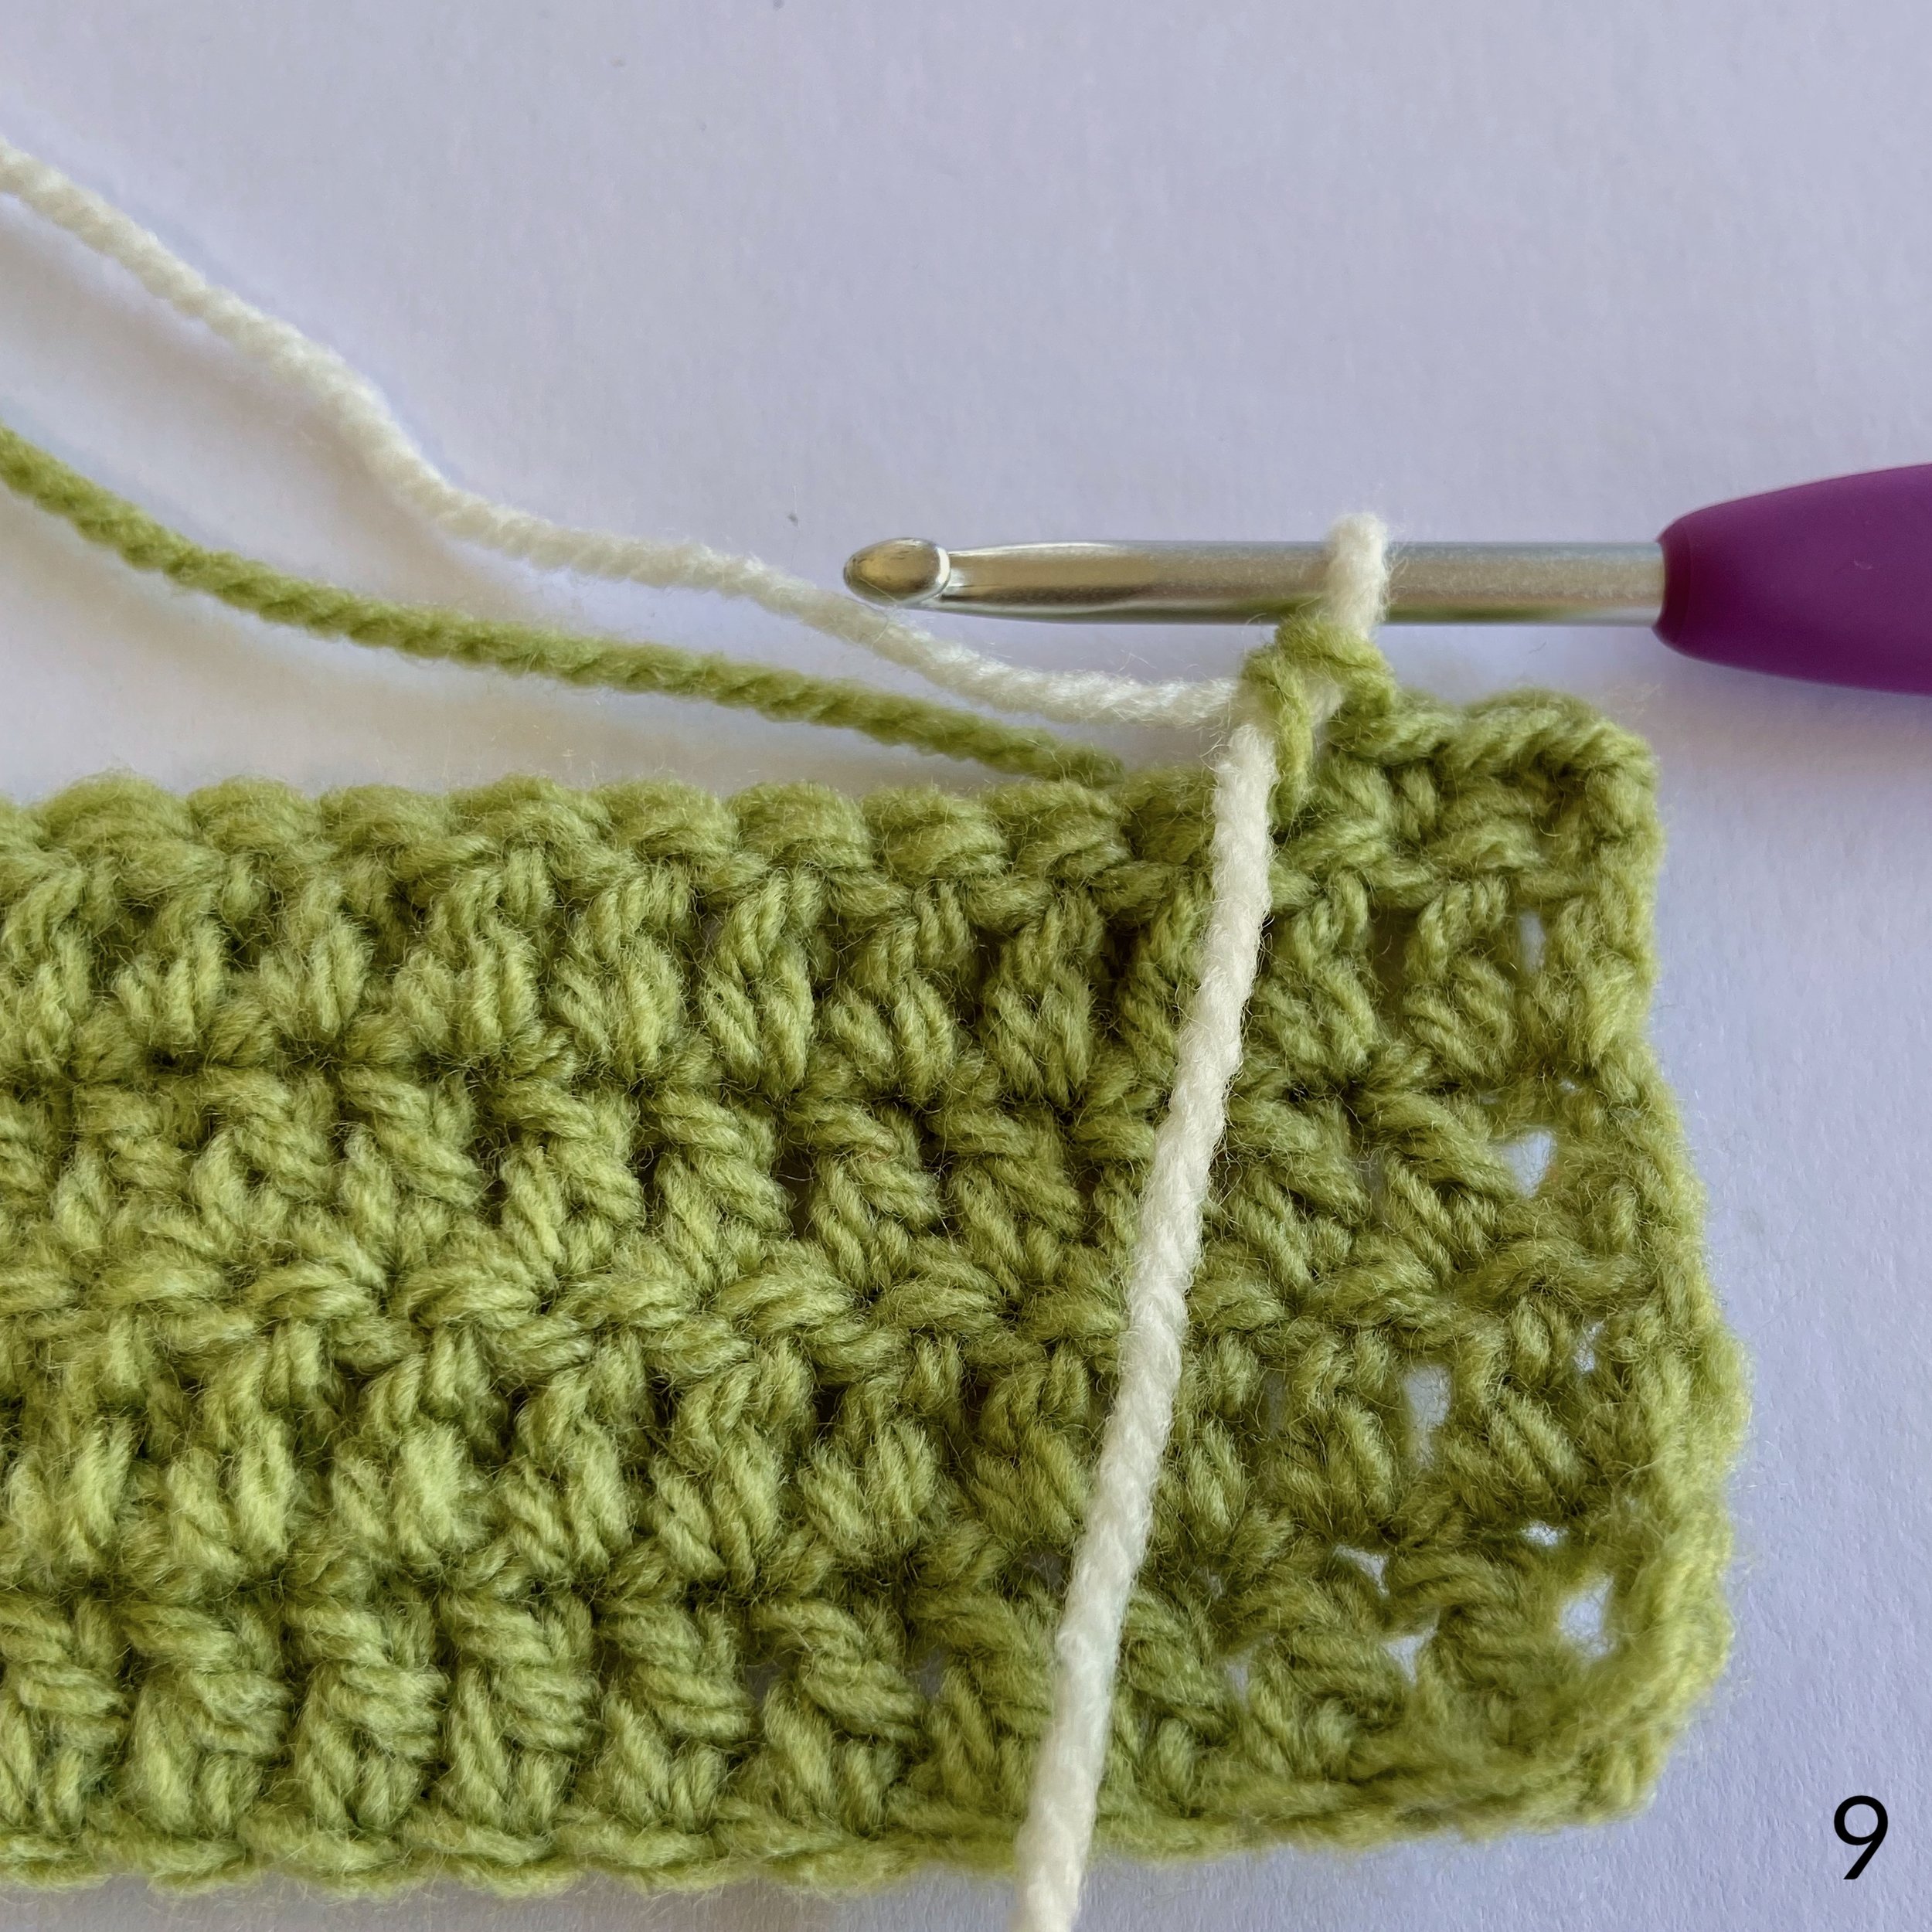
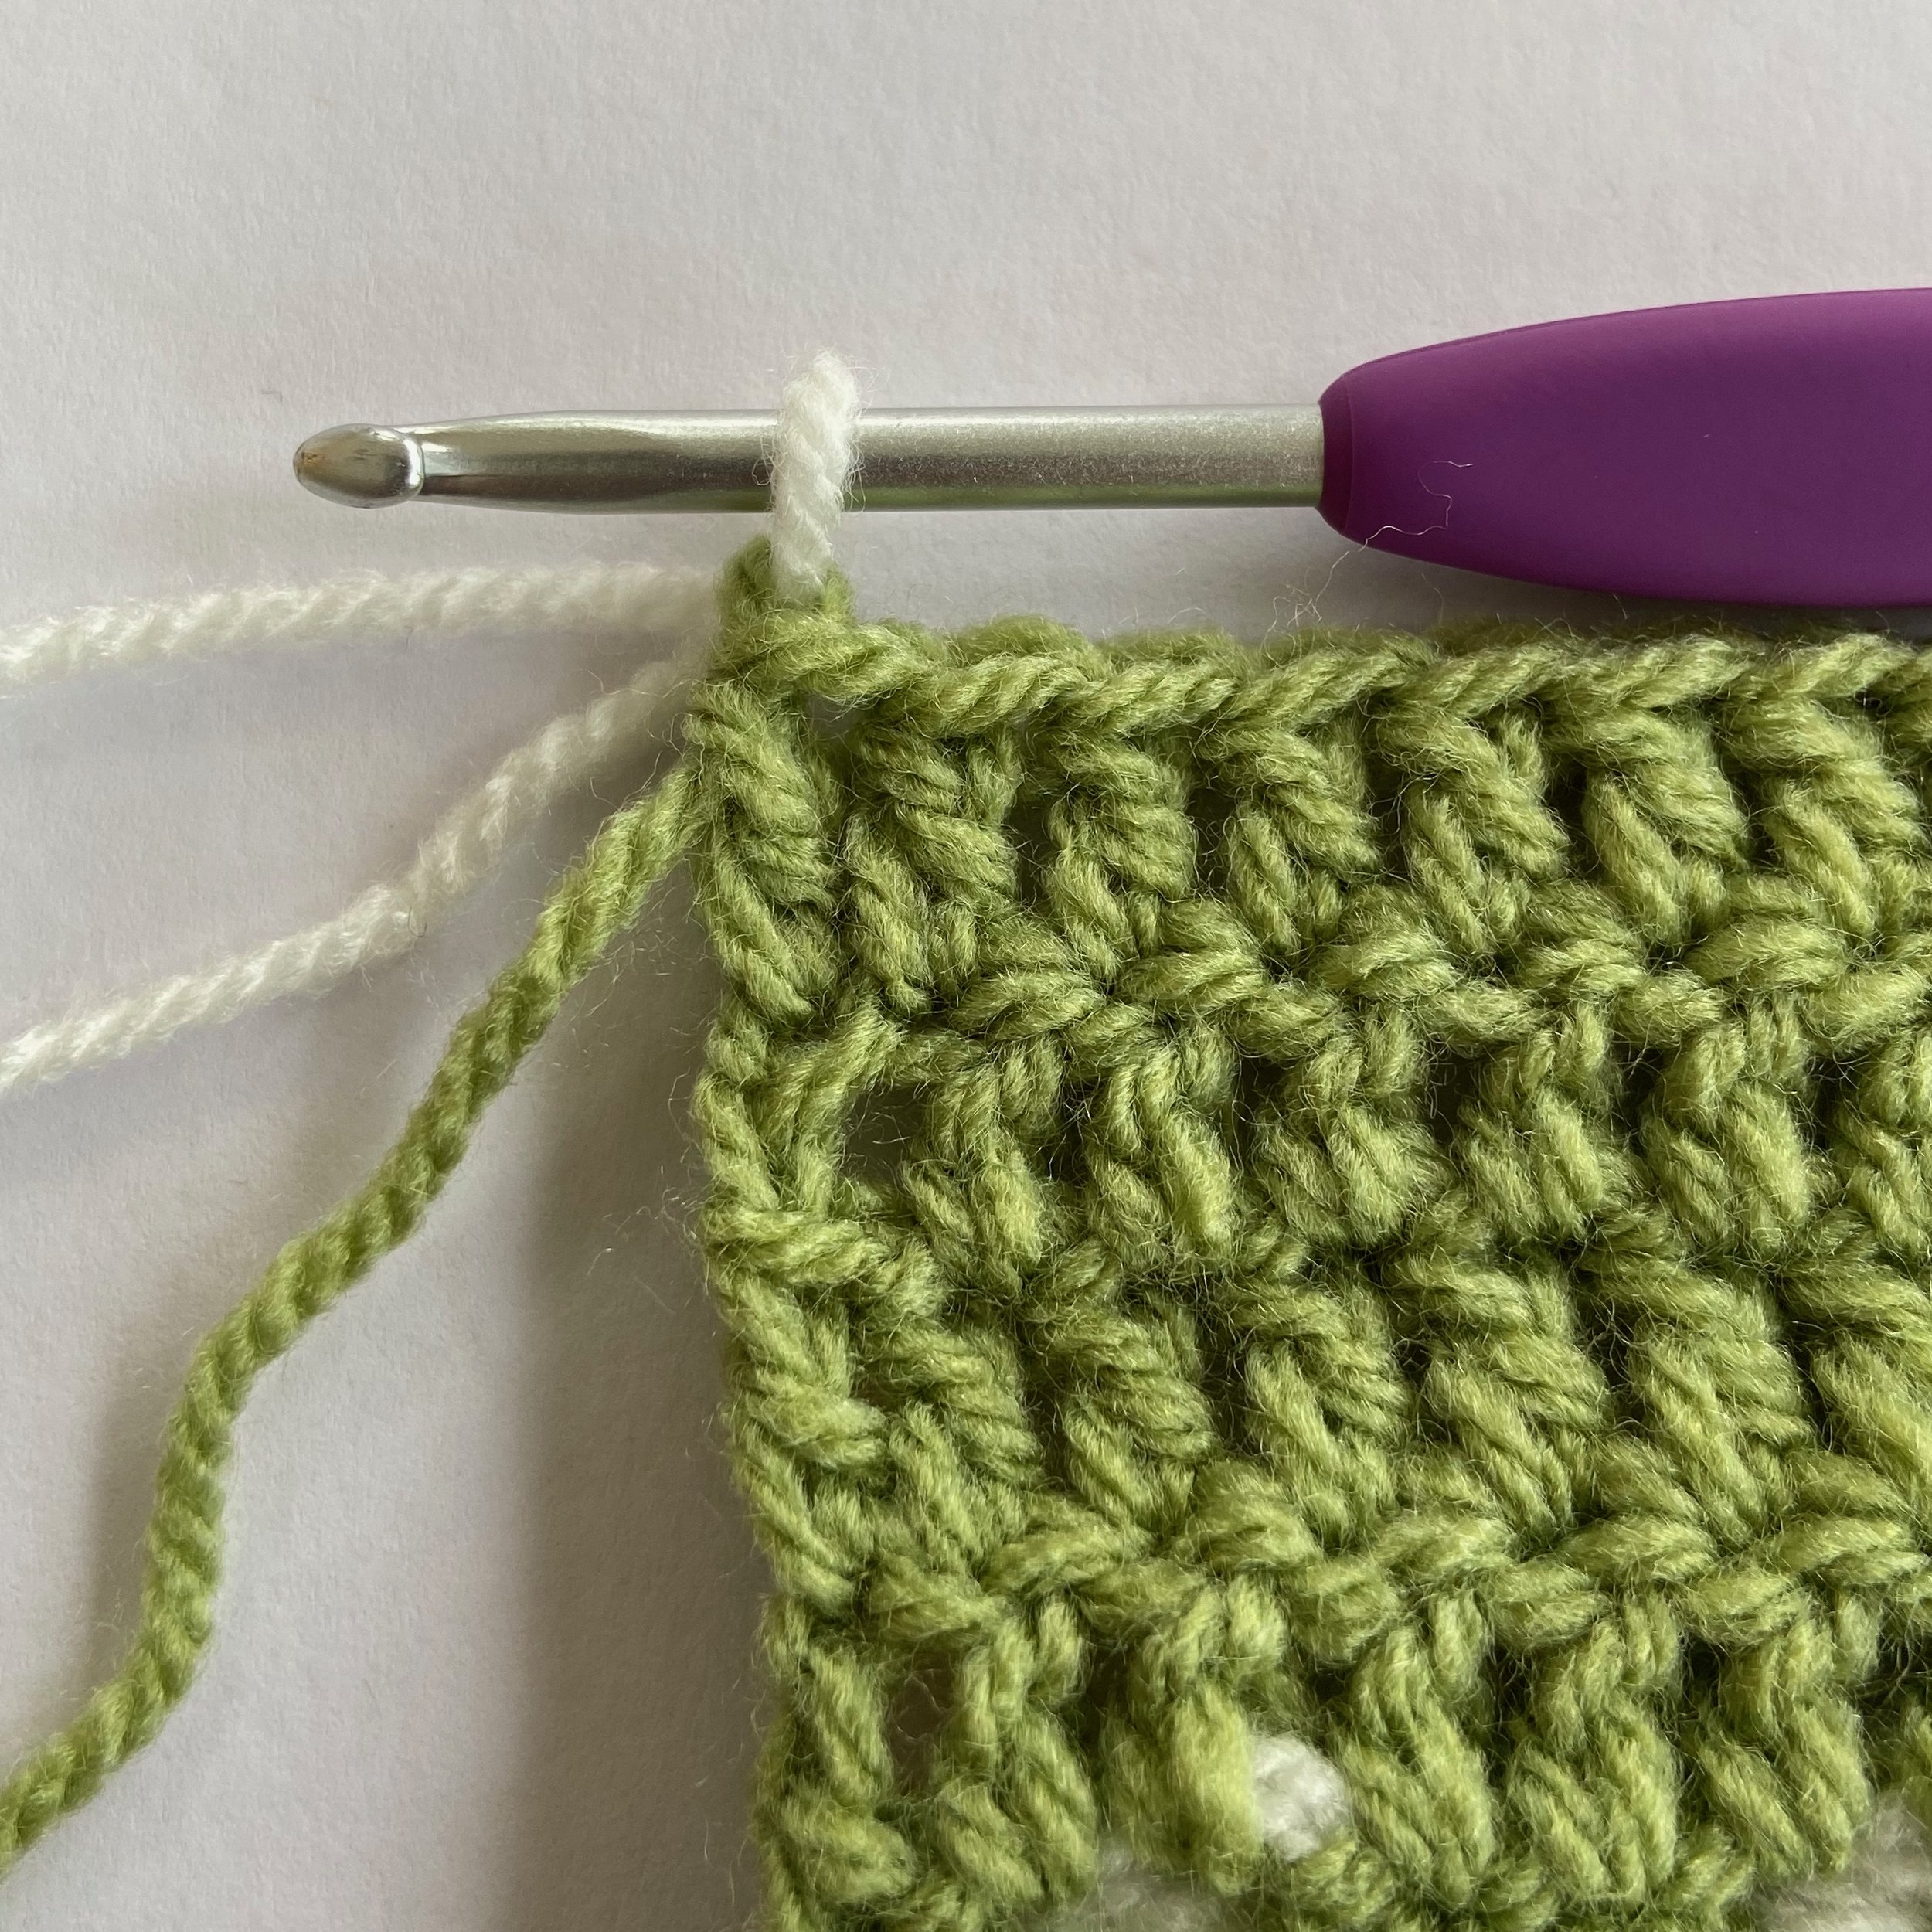
Row 5: Bobble Row. 1 dc in each of the first 3 sts. Join B in last pull through of 3rd dc, make bobble. [3 dc, make bobble] until 2 sts remain. 1 dc in each of the last 2 sts. 2 ch, turn. Cut cream.
7. The 1 ch does not count as a stitch, so place your first stitch where the needle is pointing.
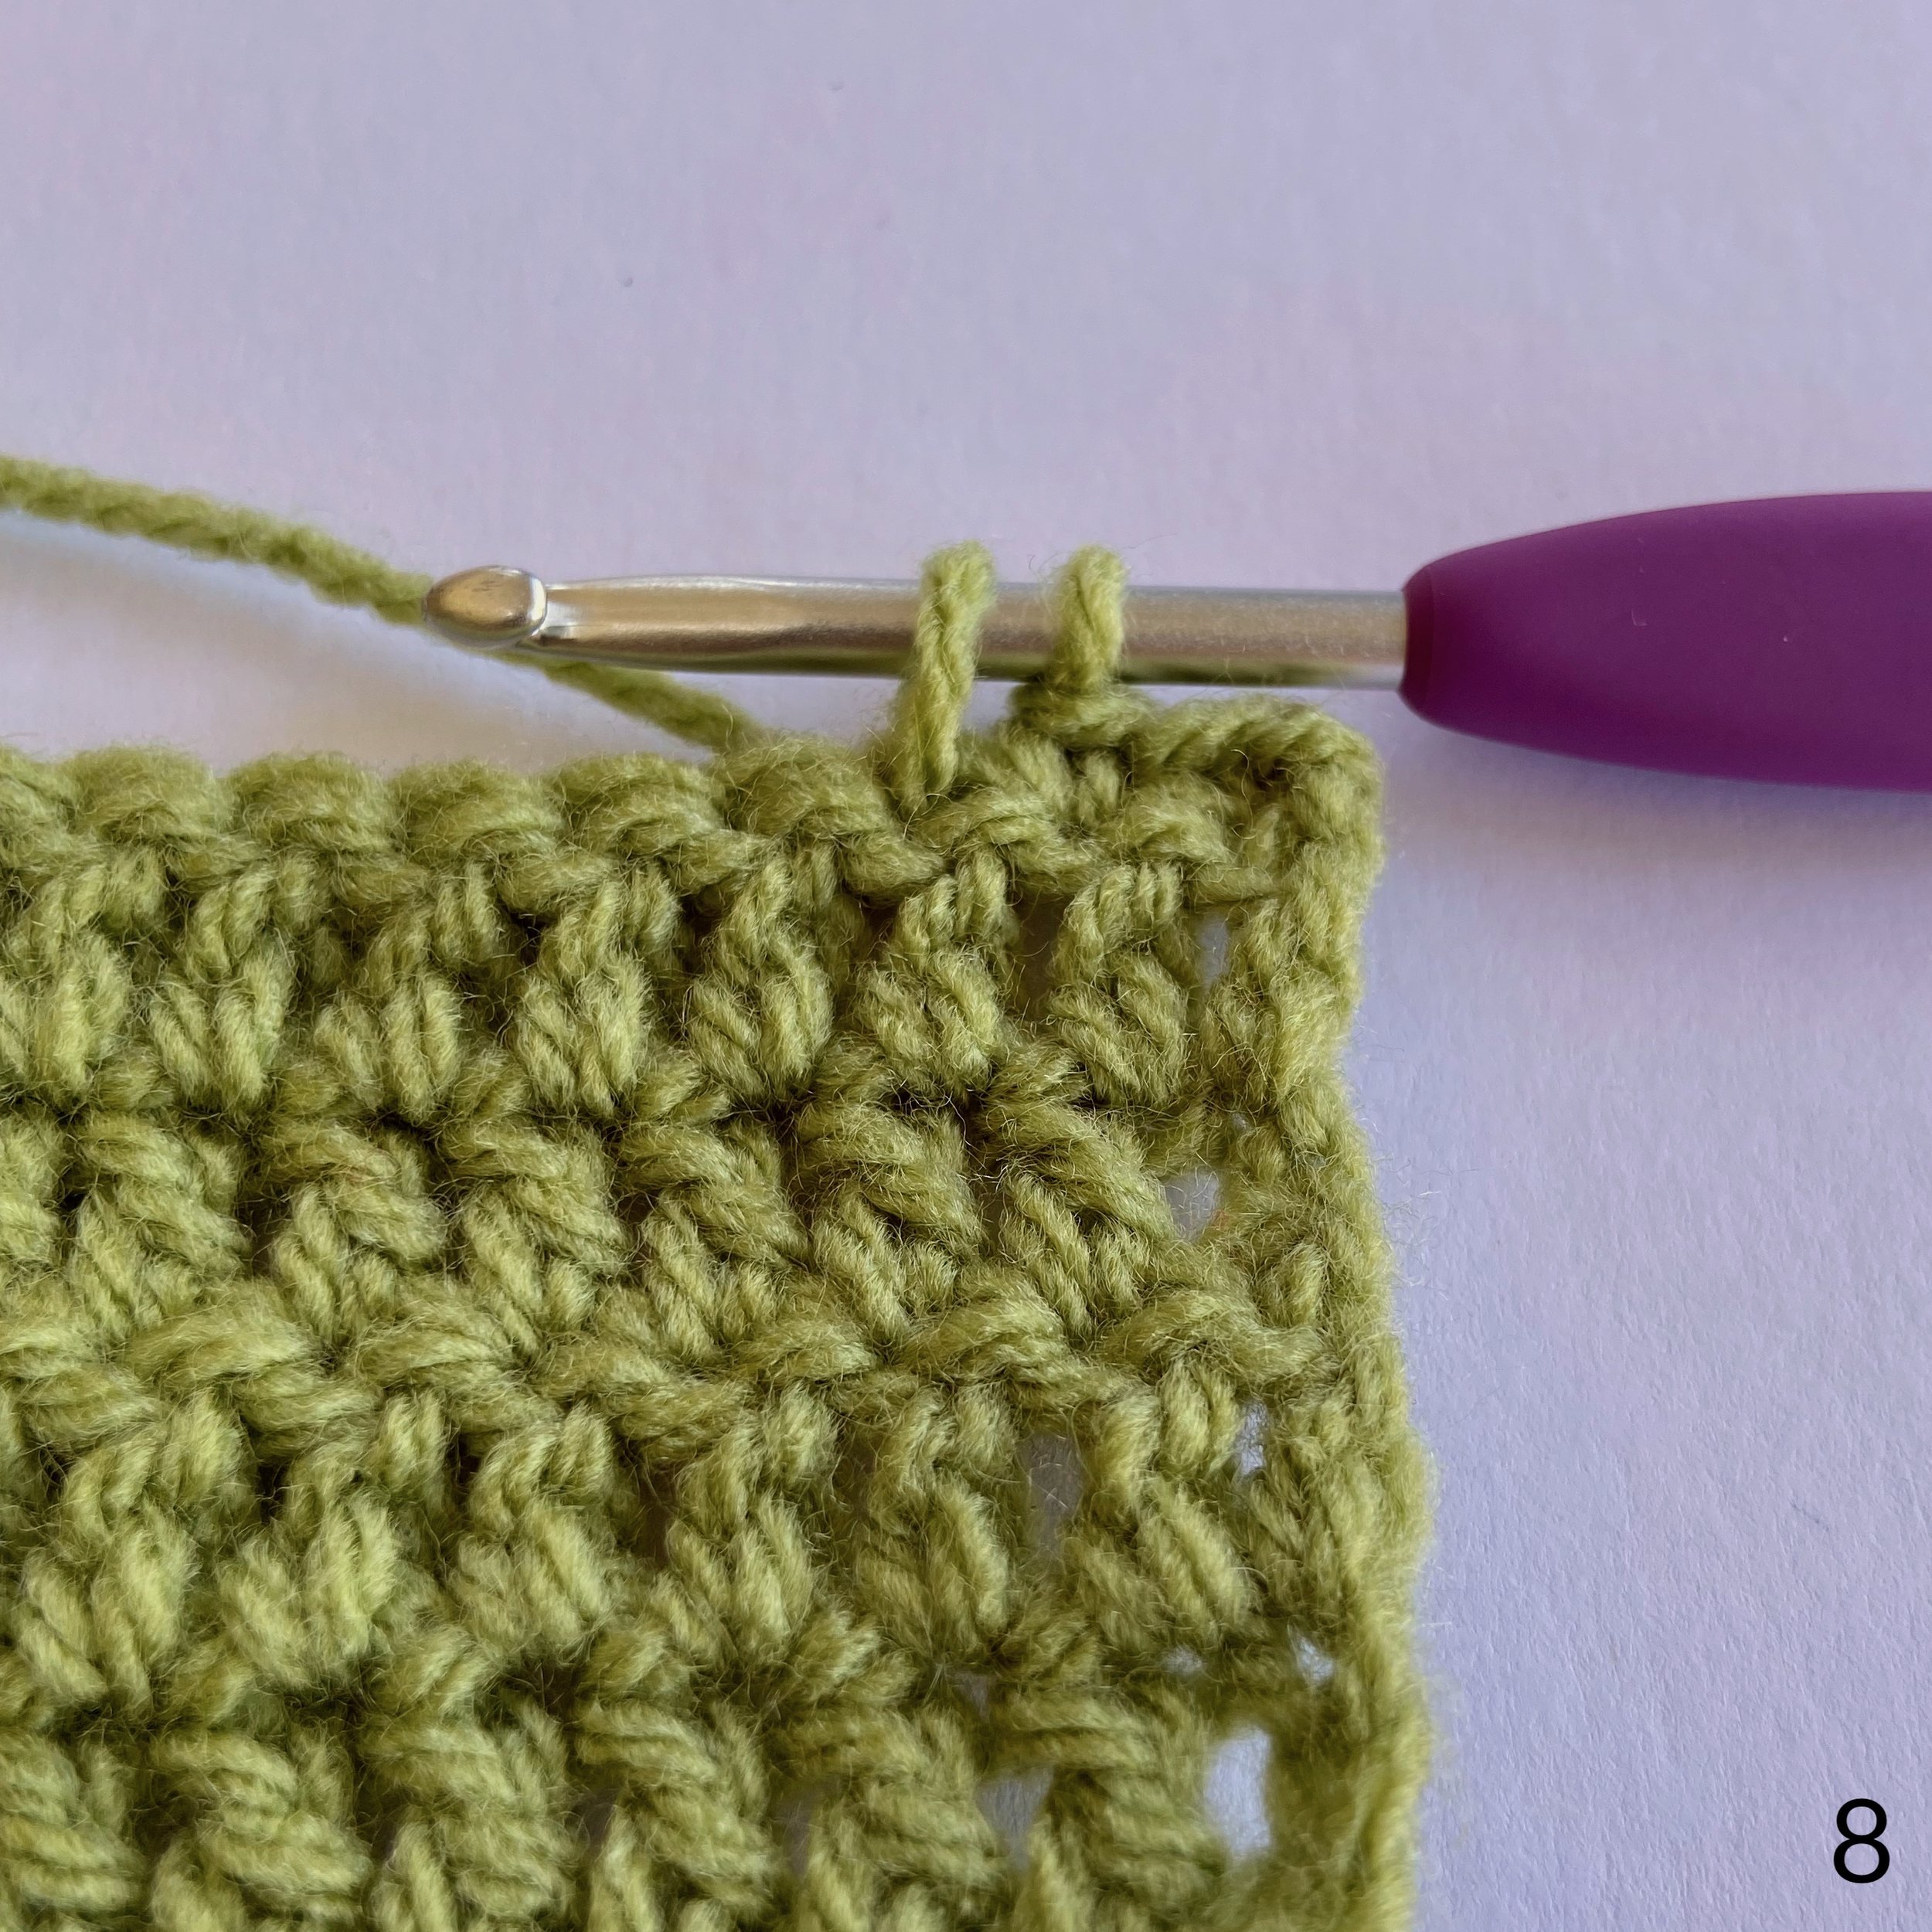
To make the bobble
8. When working the 3rd dc, stop while you still have 2 loops on the hook.
9. Complete the stitch by pulling through a loop of B.
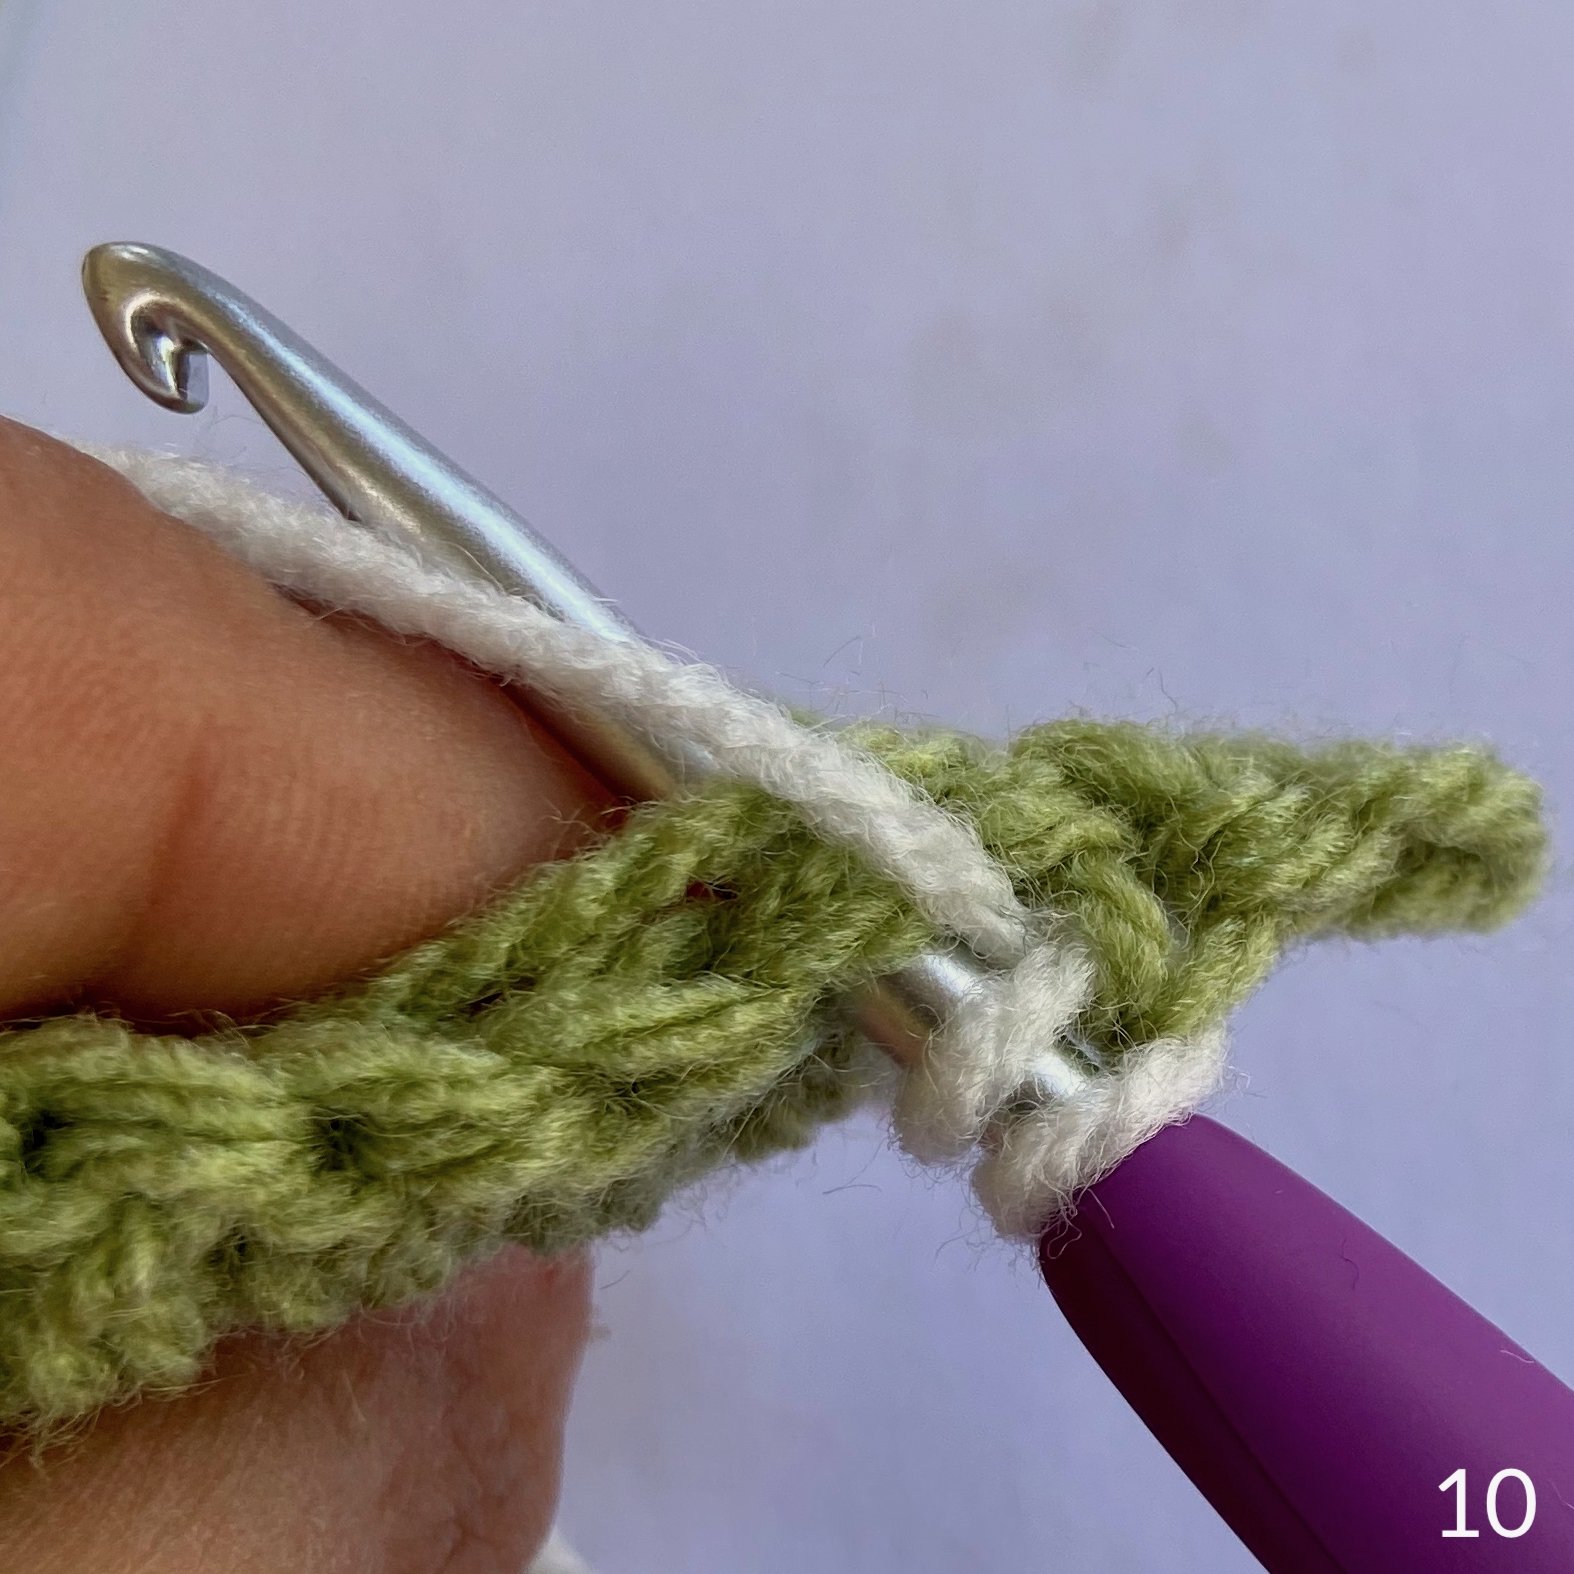
10. Bring A and B towards you.
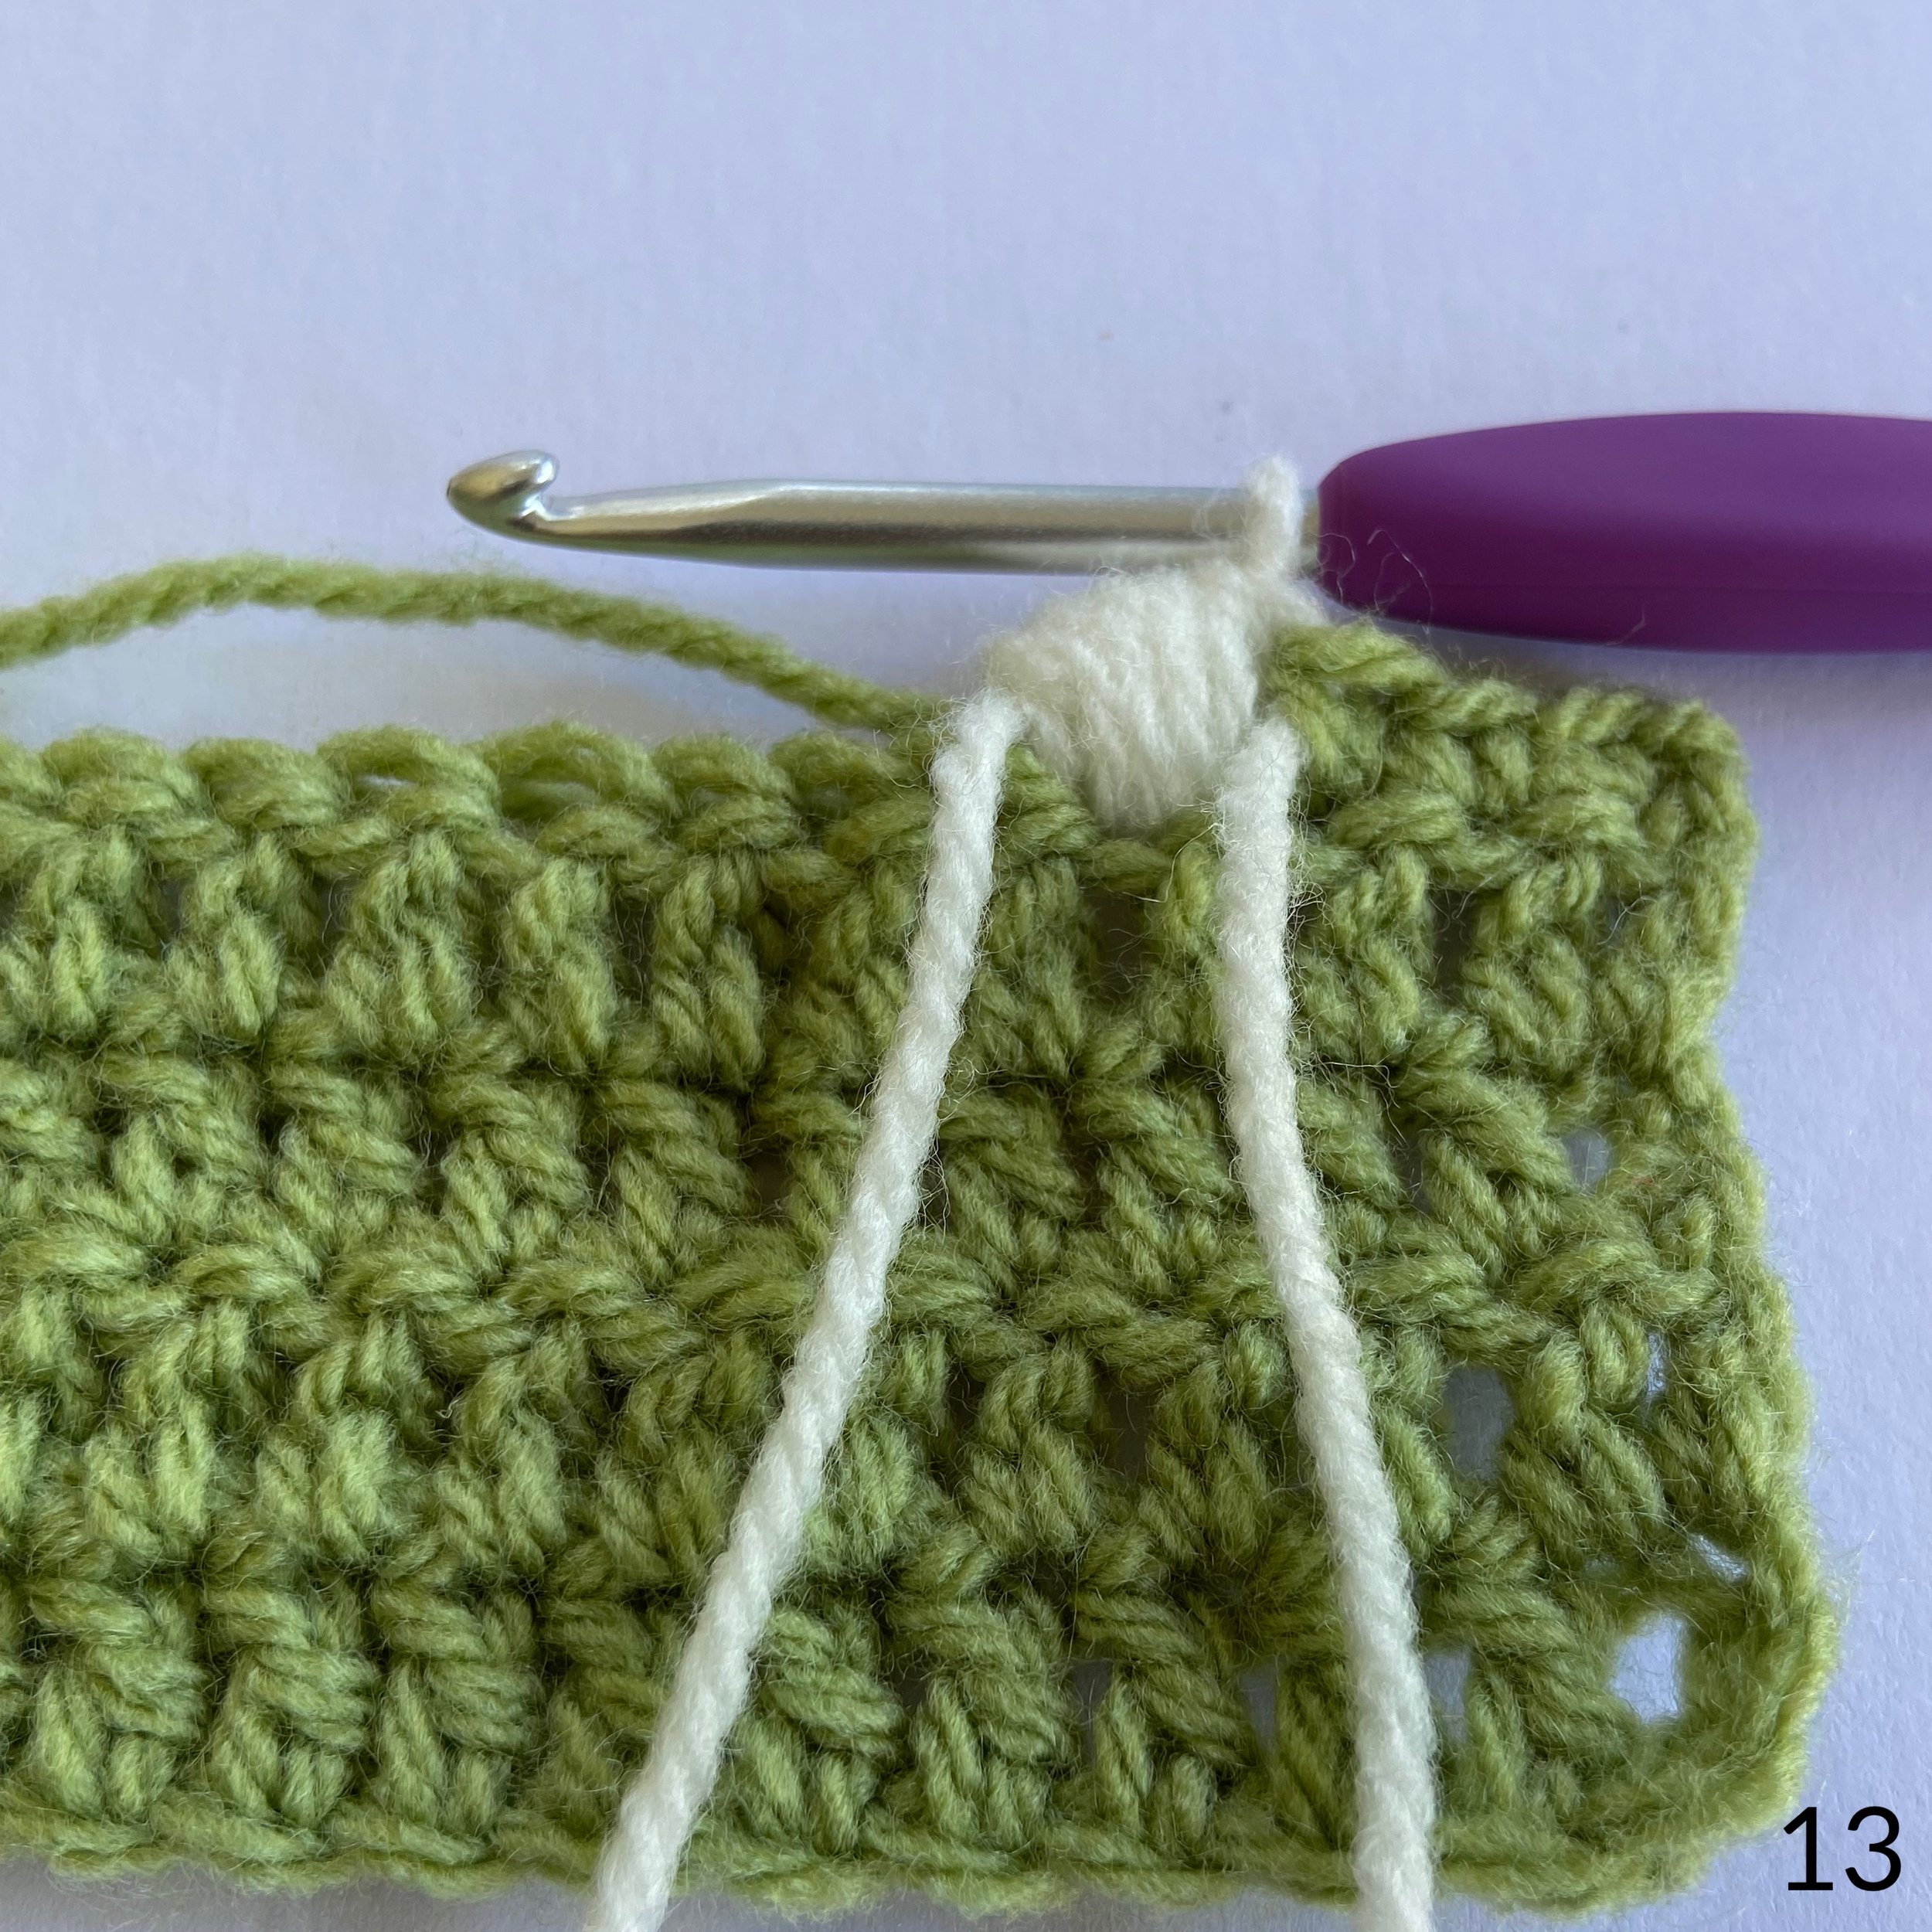
11. Yo, insert hook into next stitch and pull up a loop, yo and pull through 2 loops. You should have 2 loops on your hook.
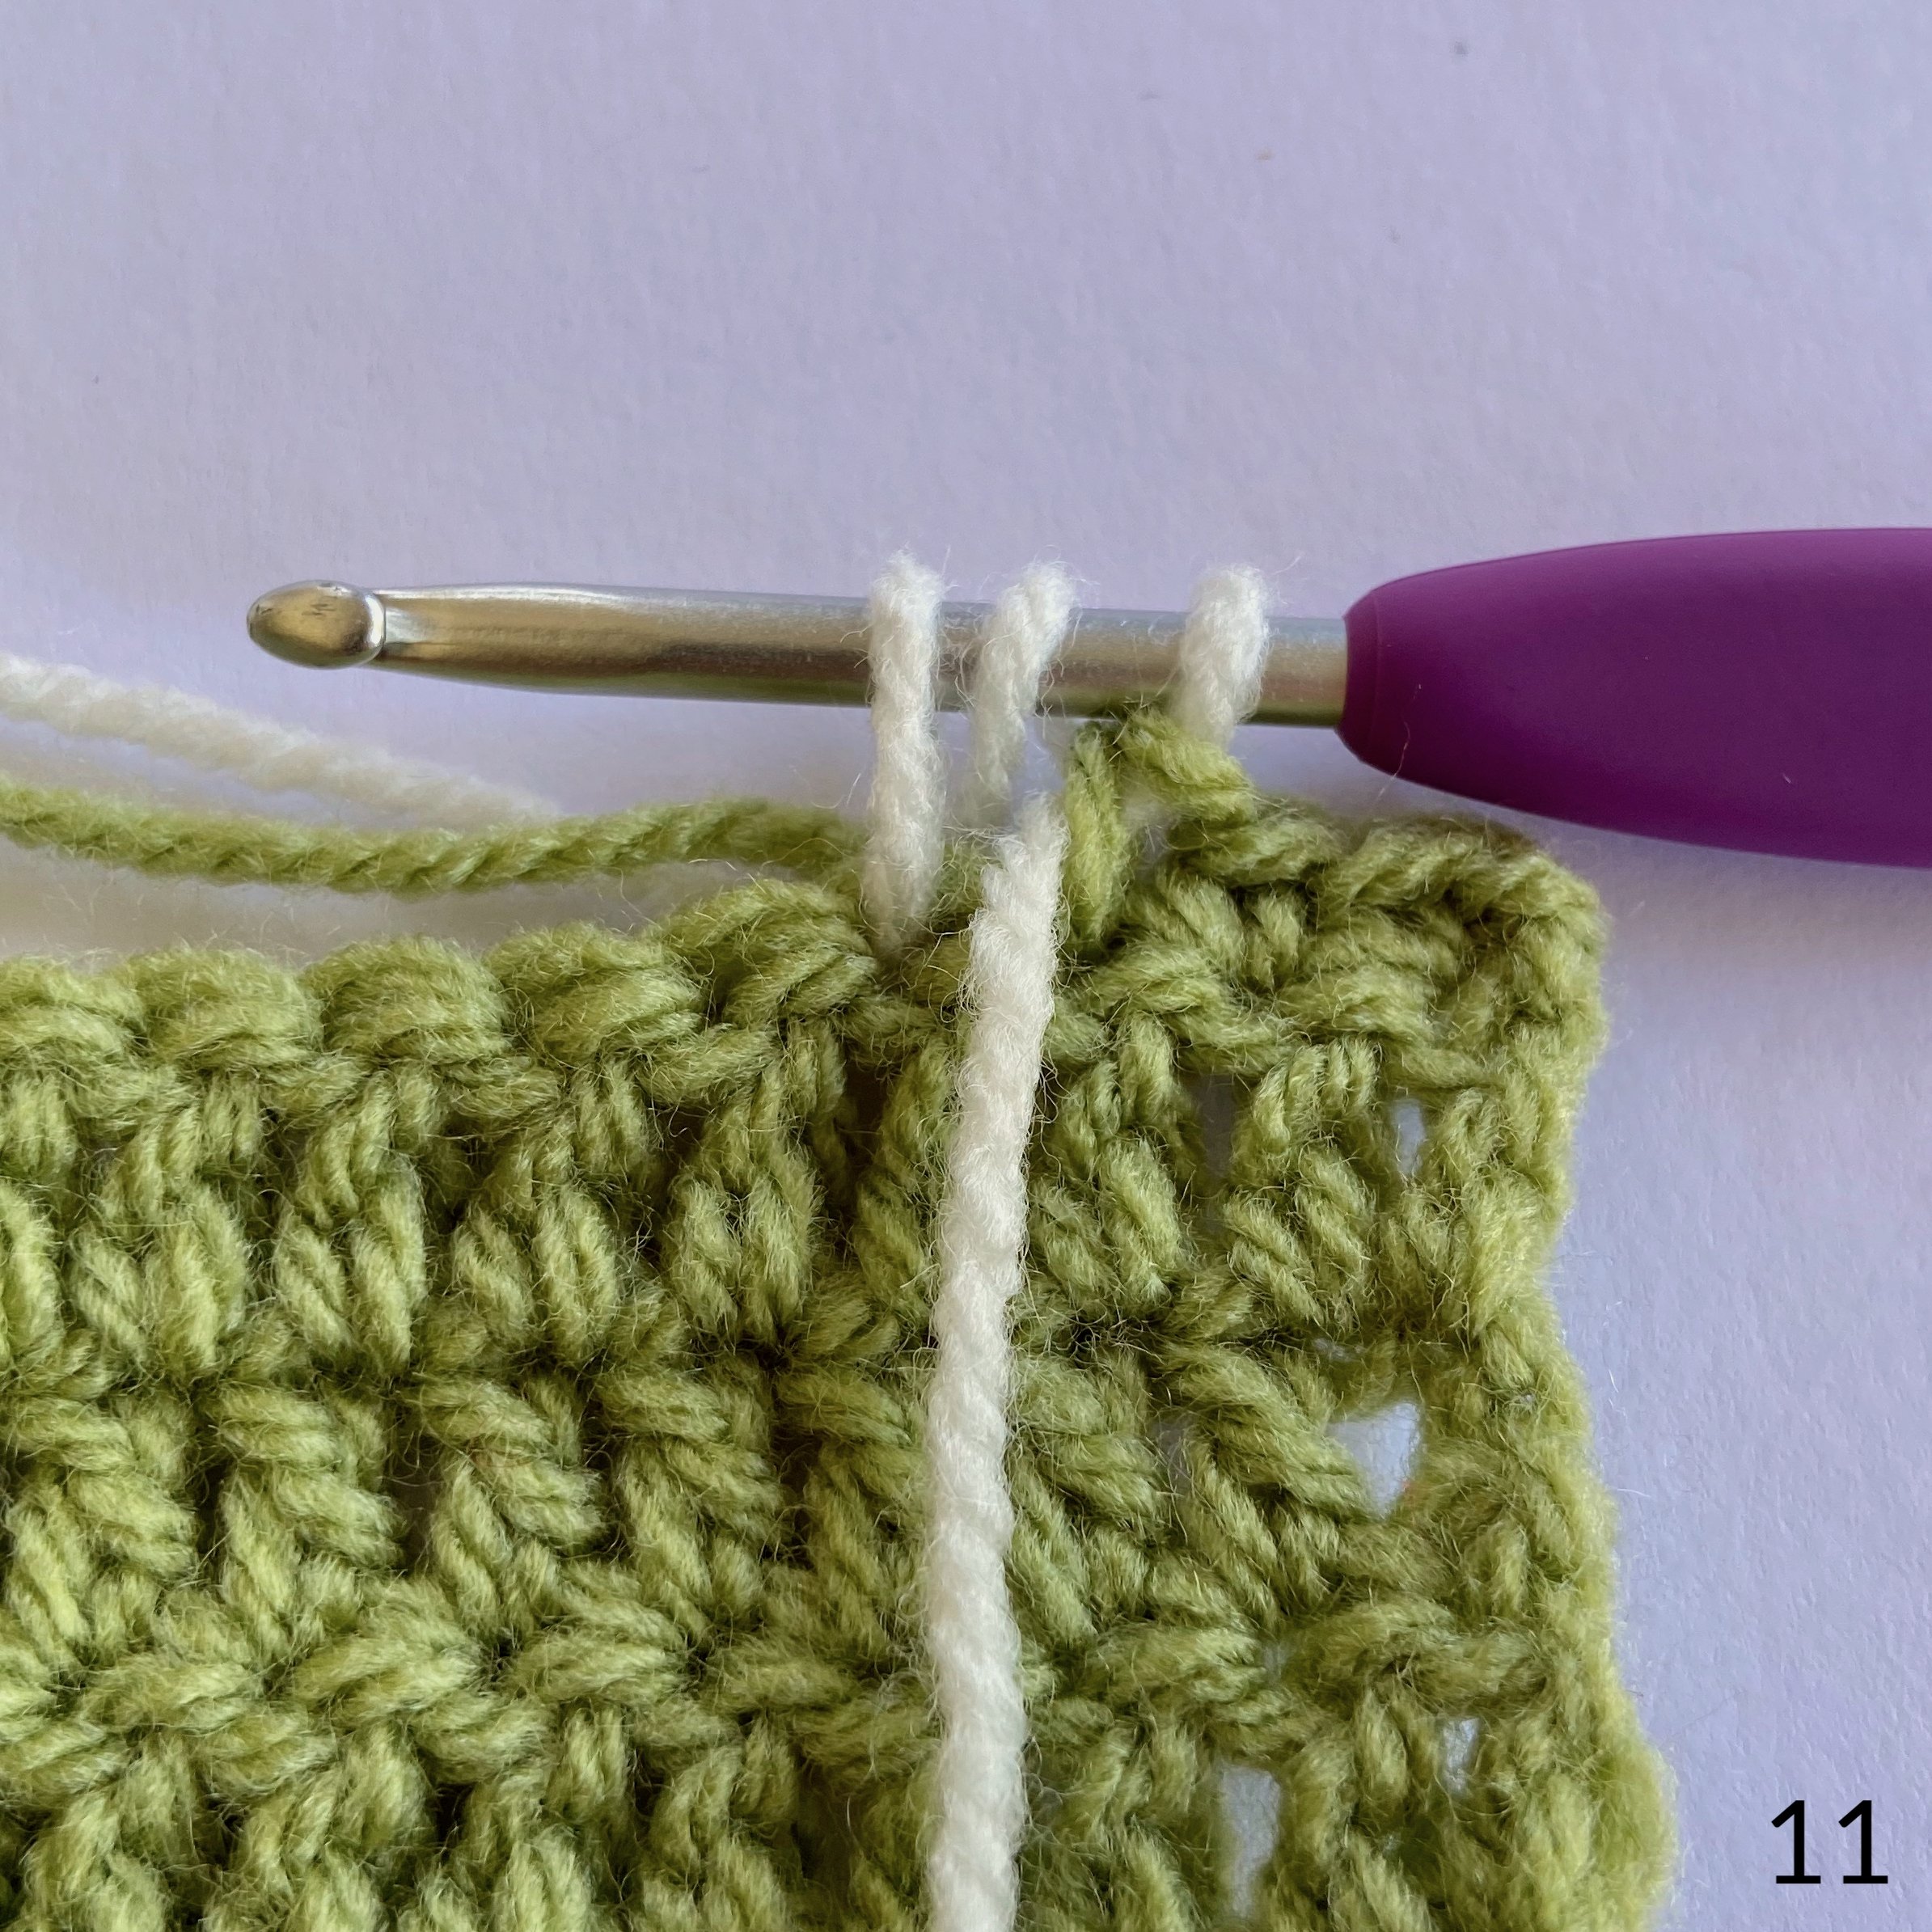
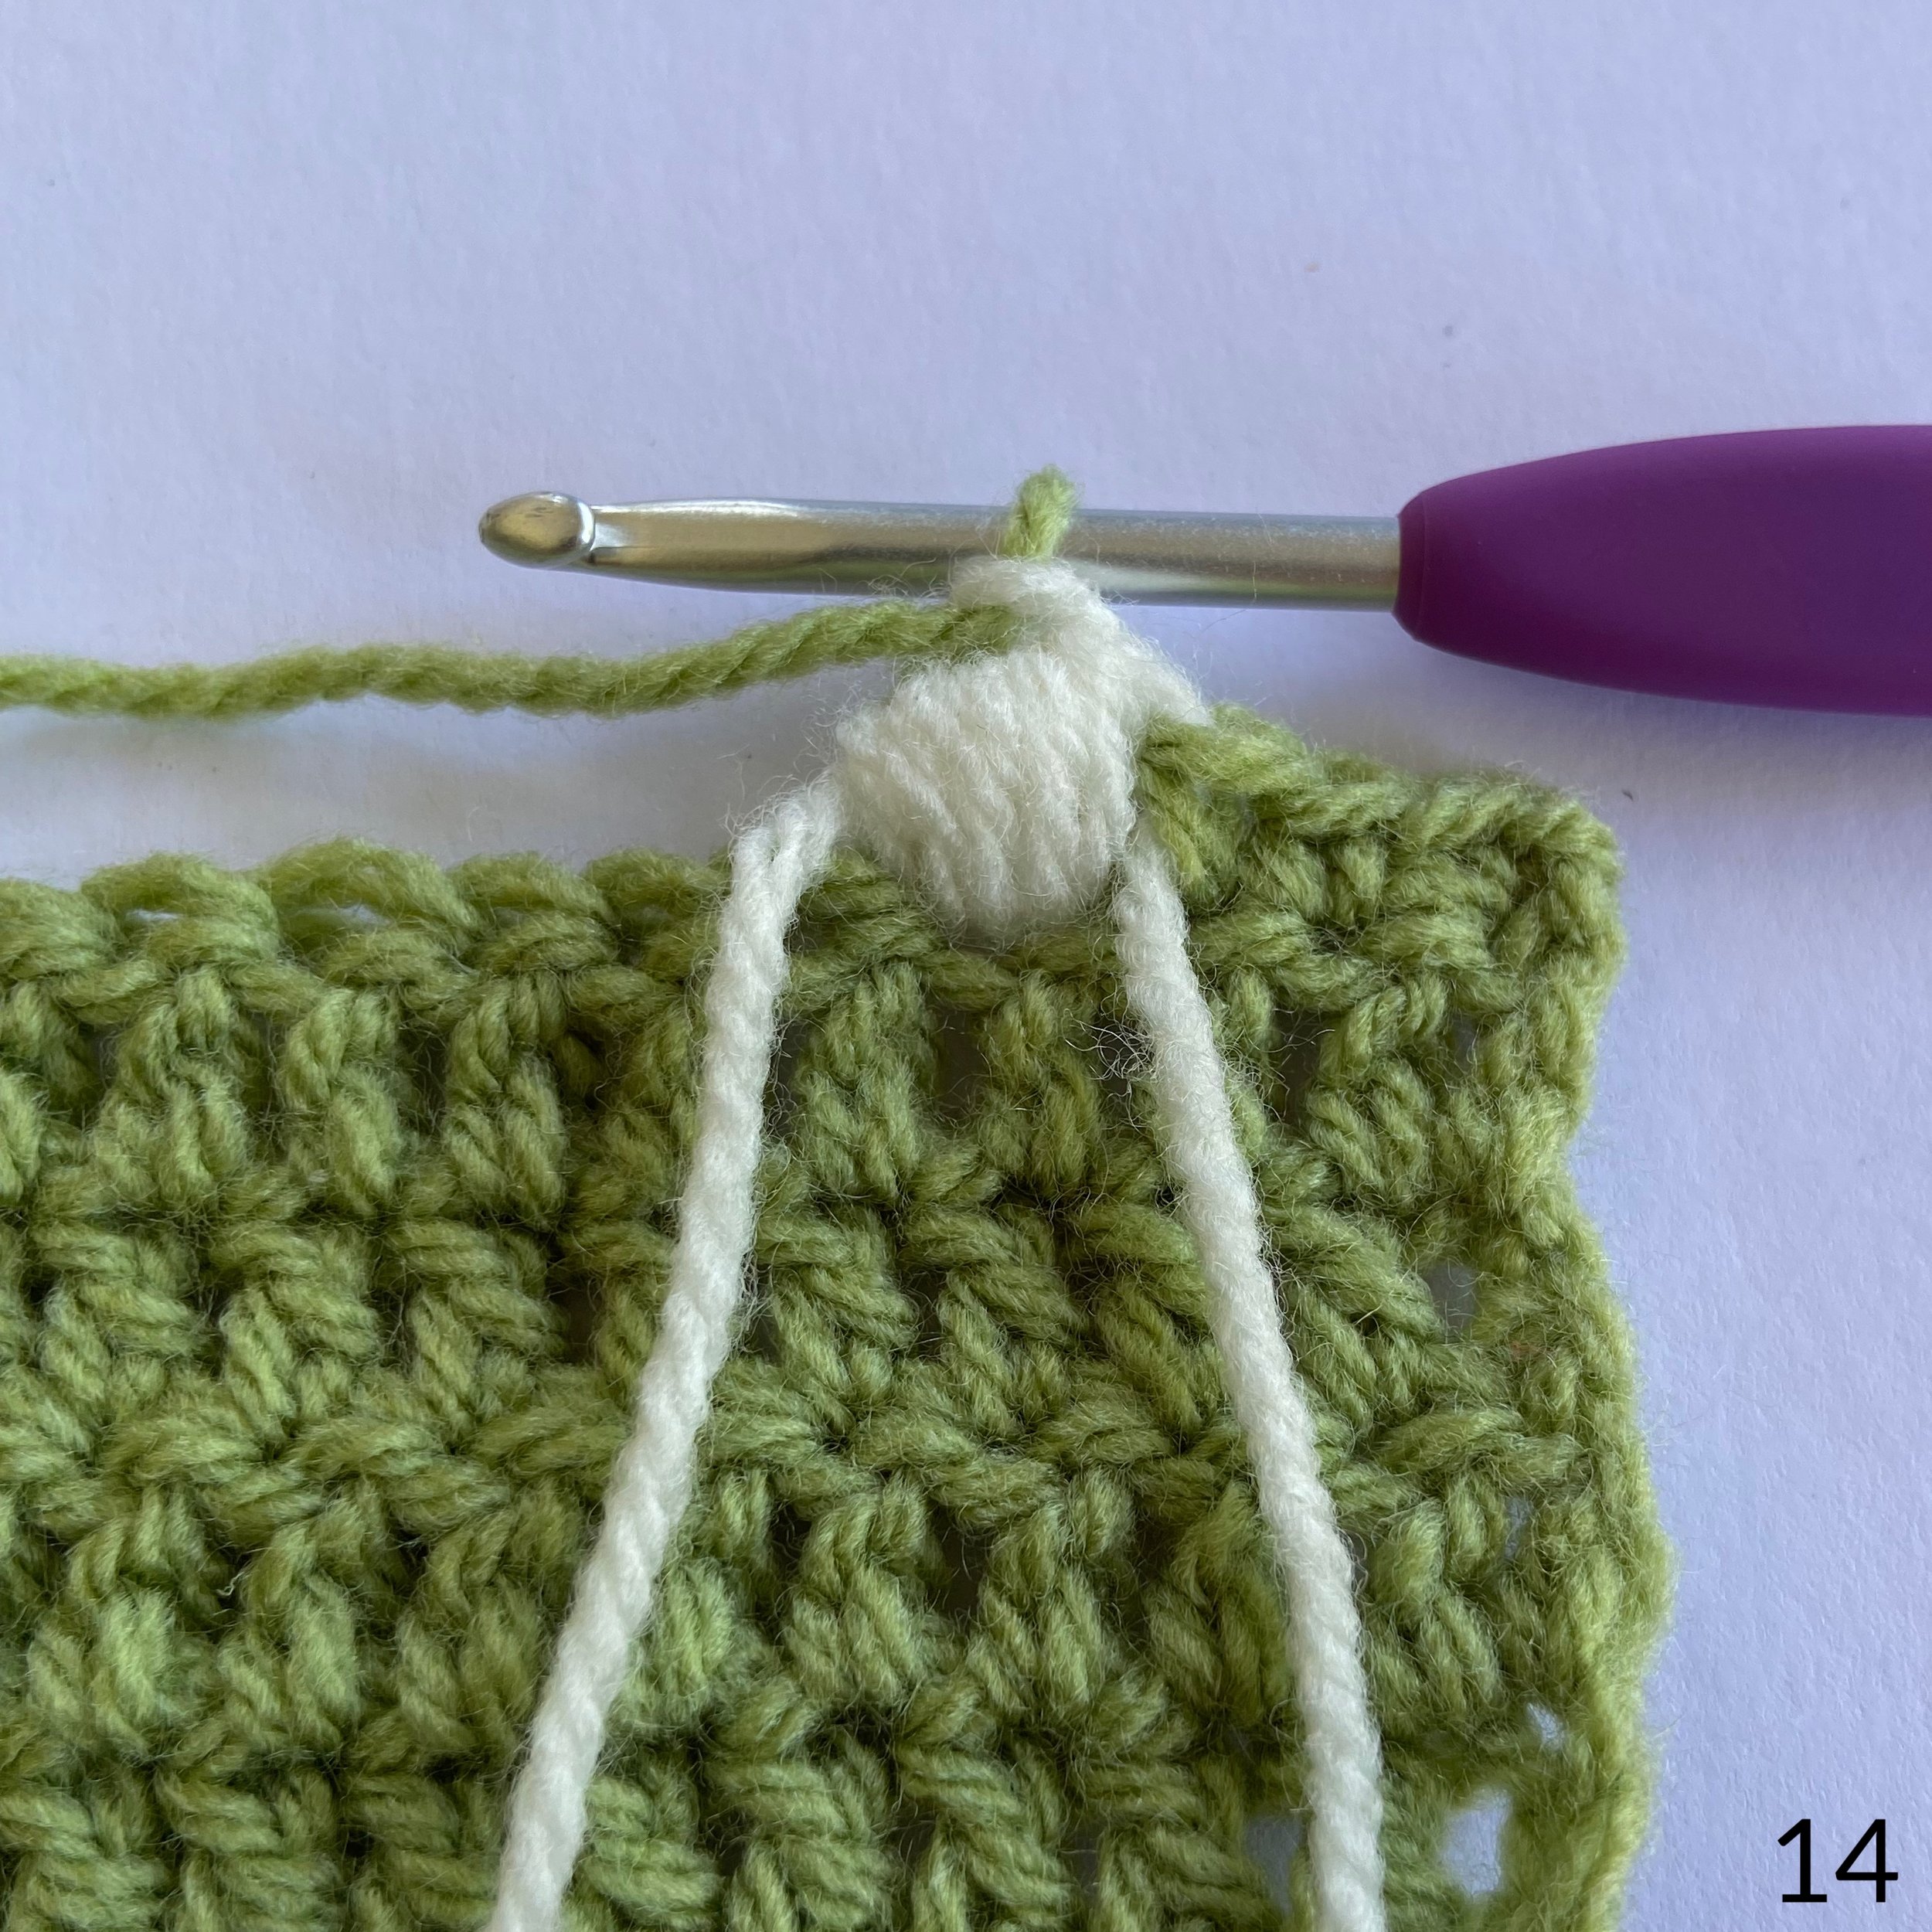
12. In the same stitch, yo, pull up a loop, yo and pull through 2 loops, 4 more times. You should have 6 loops on your hook.
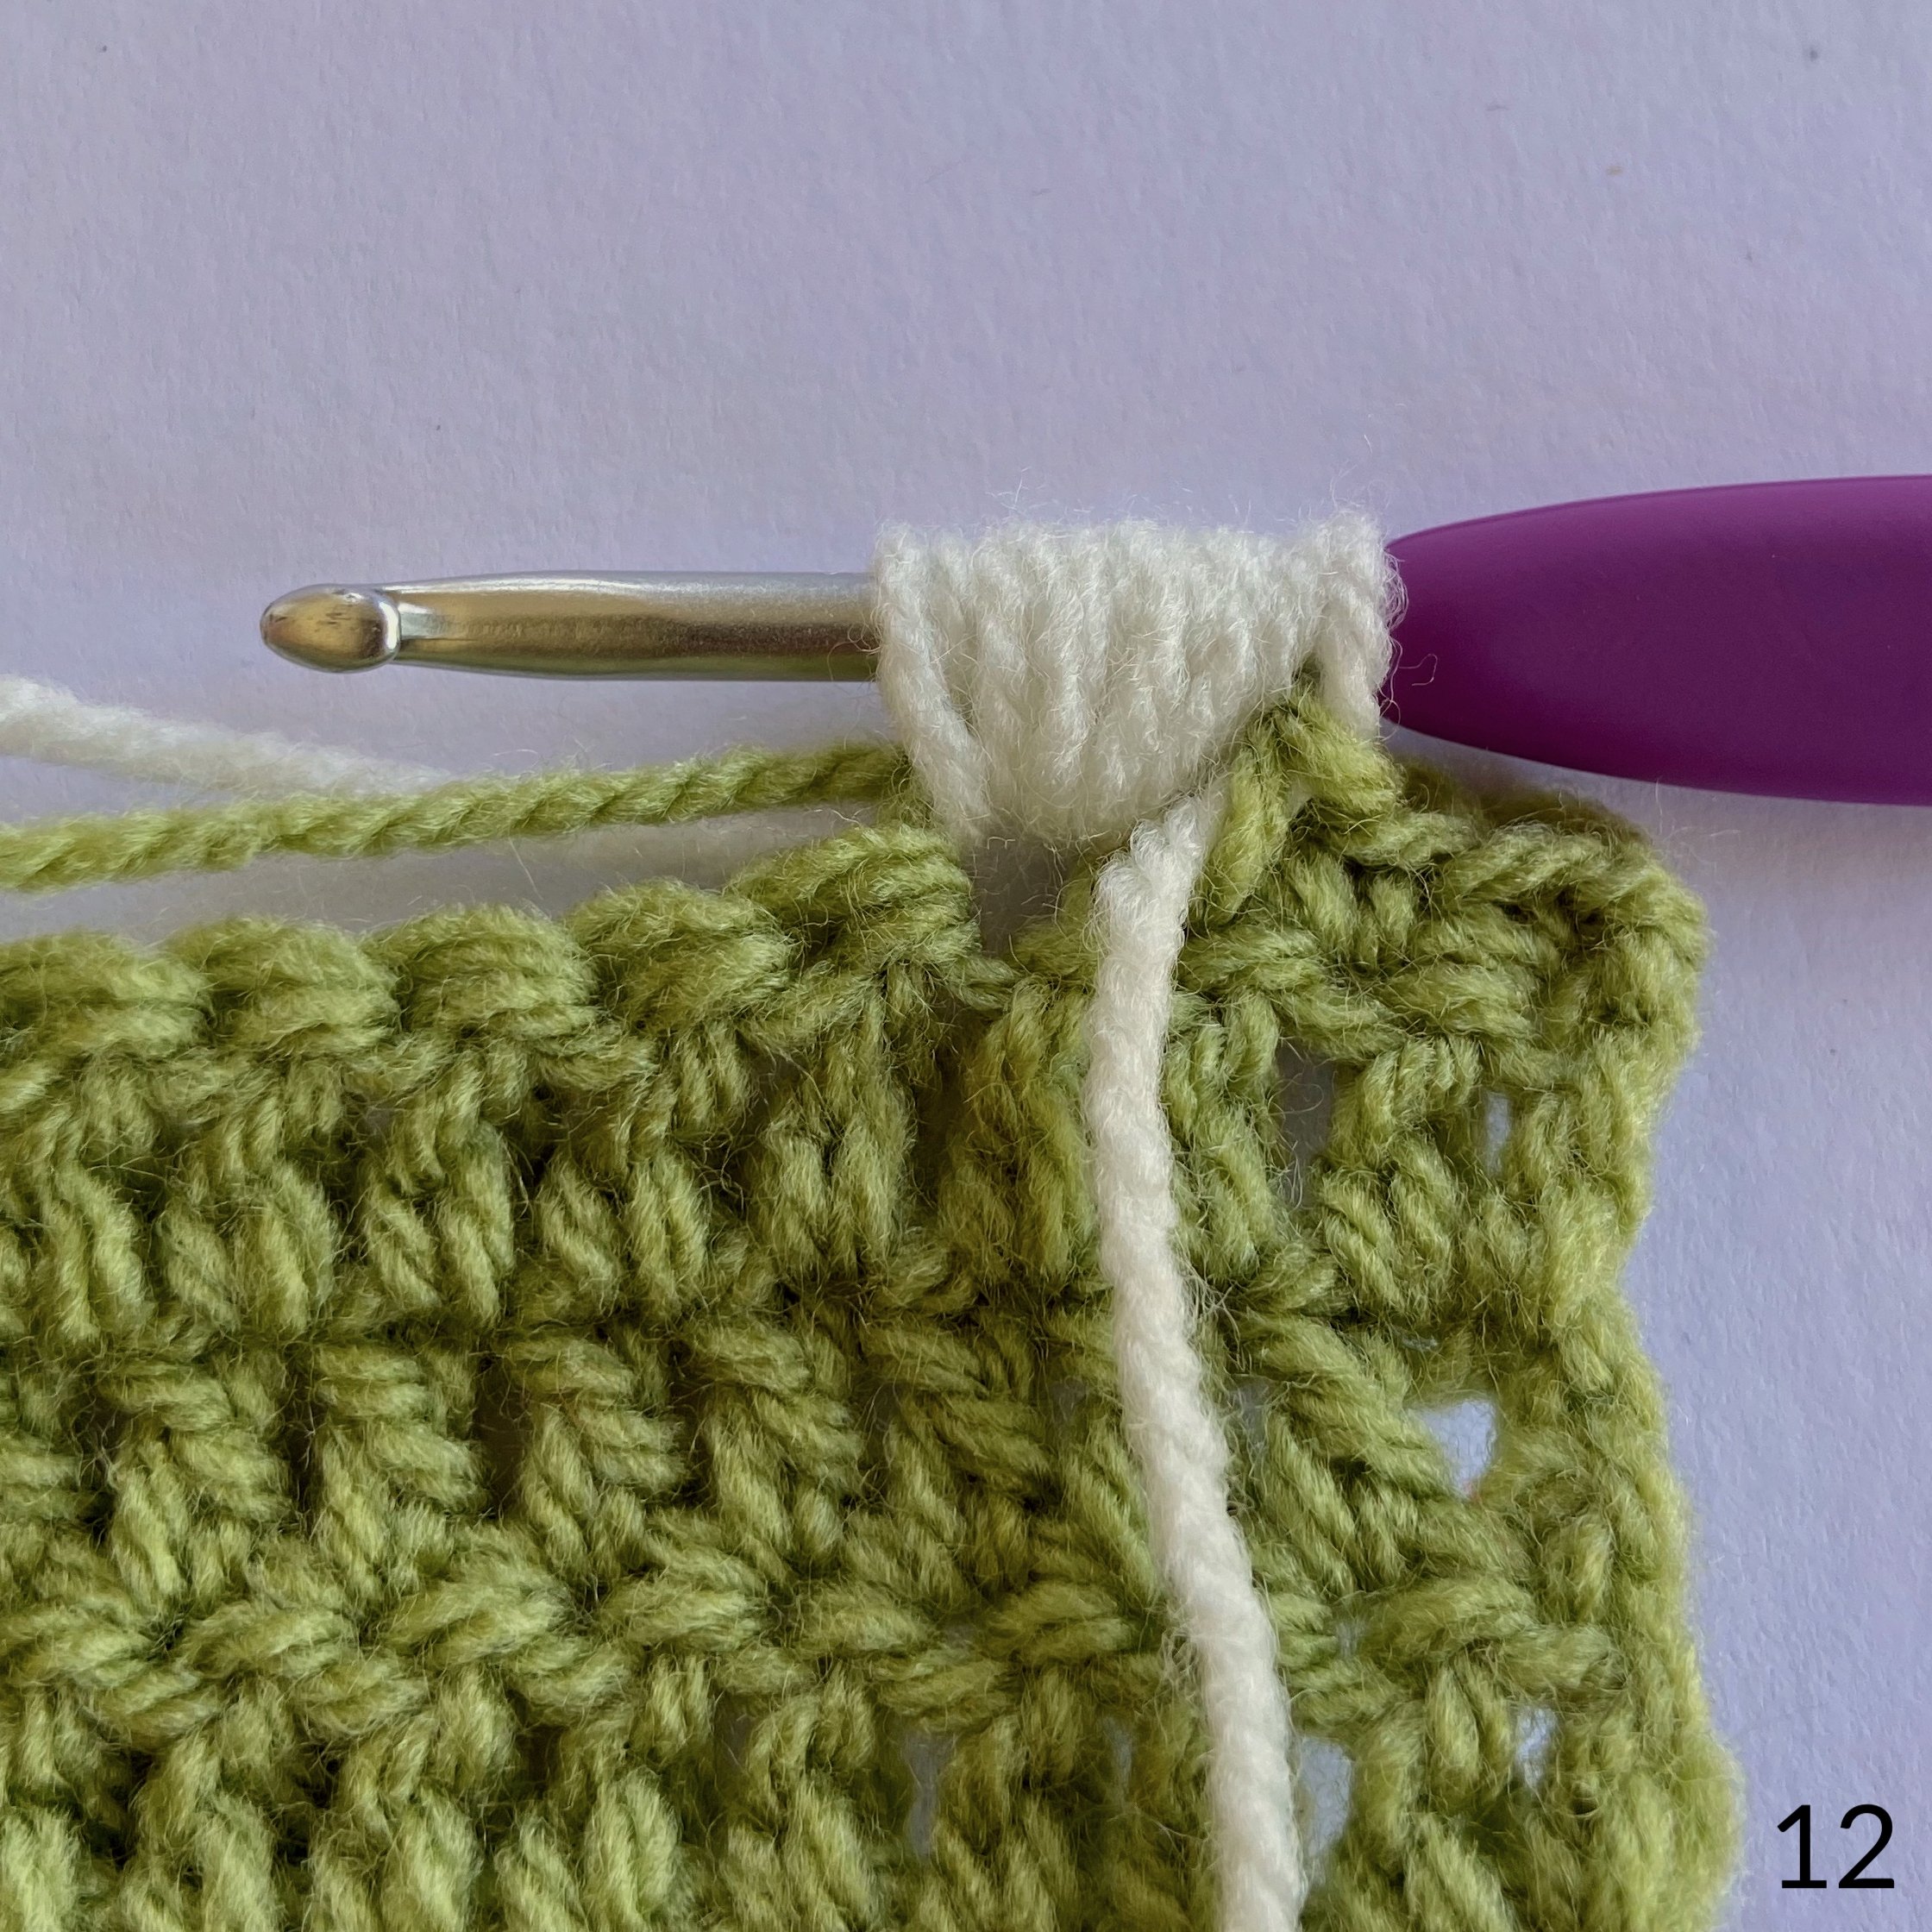
13. Using A, yo and pull through all loops on your hook to complete the bobble.
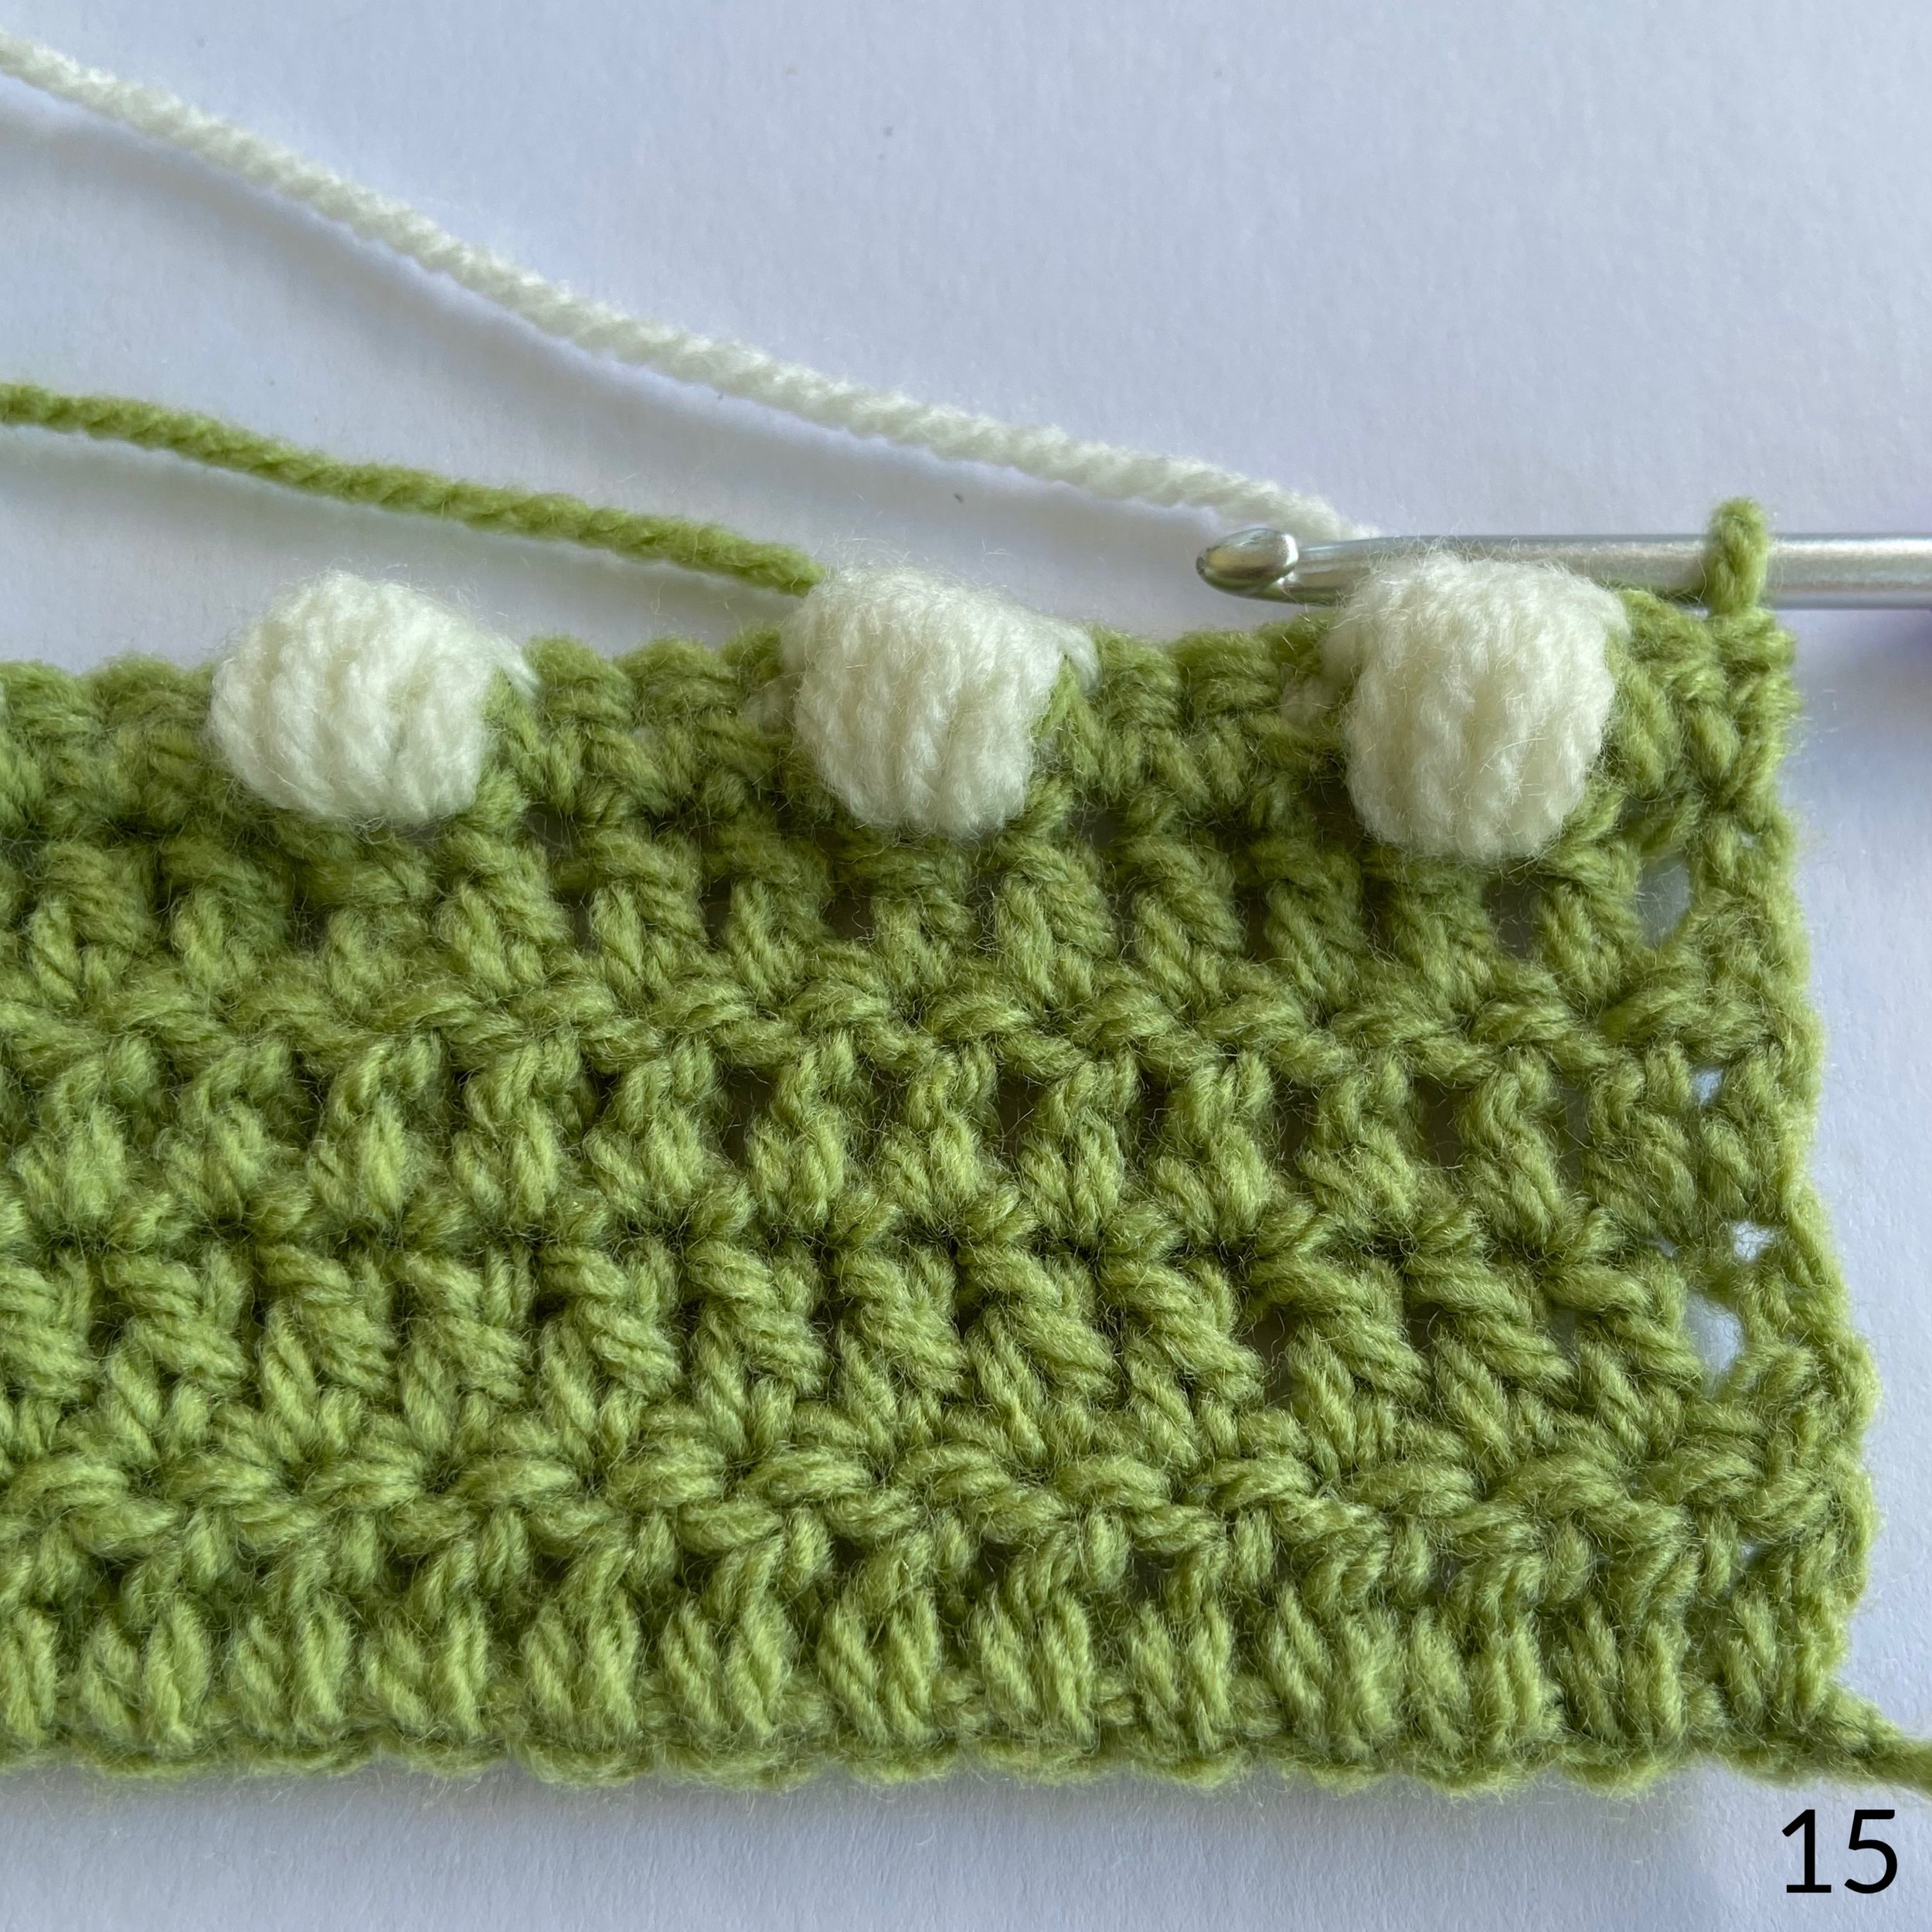
14. Repeat the steps above, working 3 dc in A followed by a bobble in B until 2 sts remain. 1 dc in A in each of the last 2 sts. Make sure that you work your dc OVER yarn B so that it is hidden.
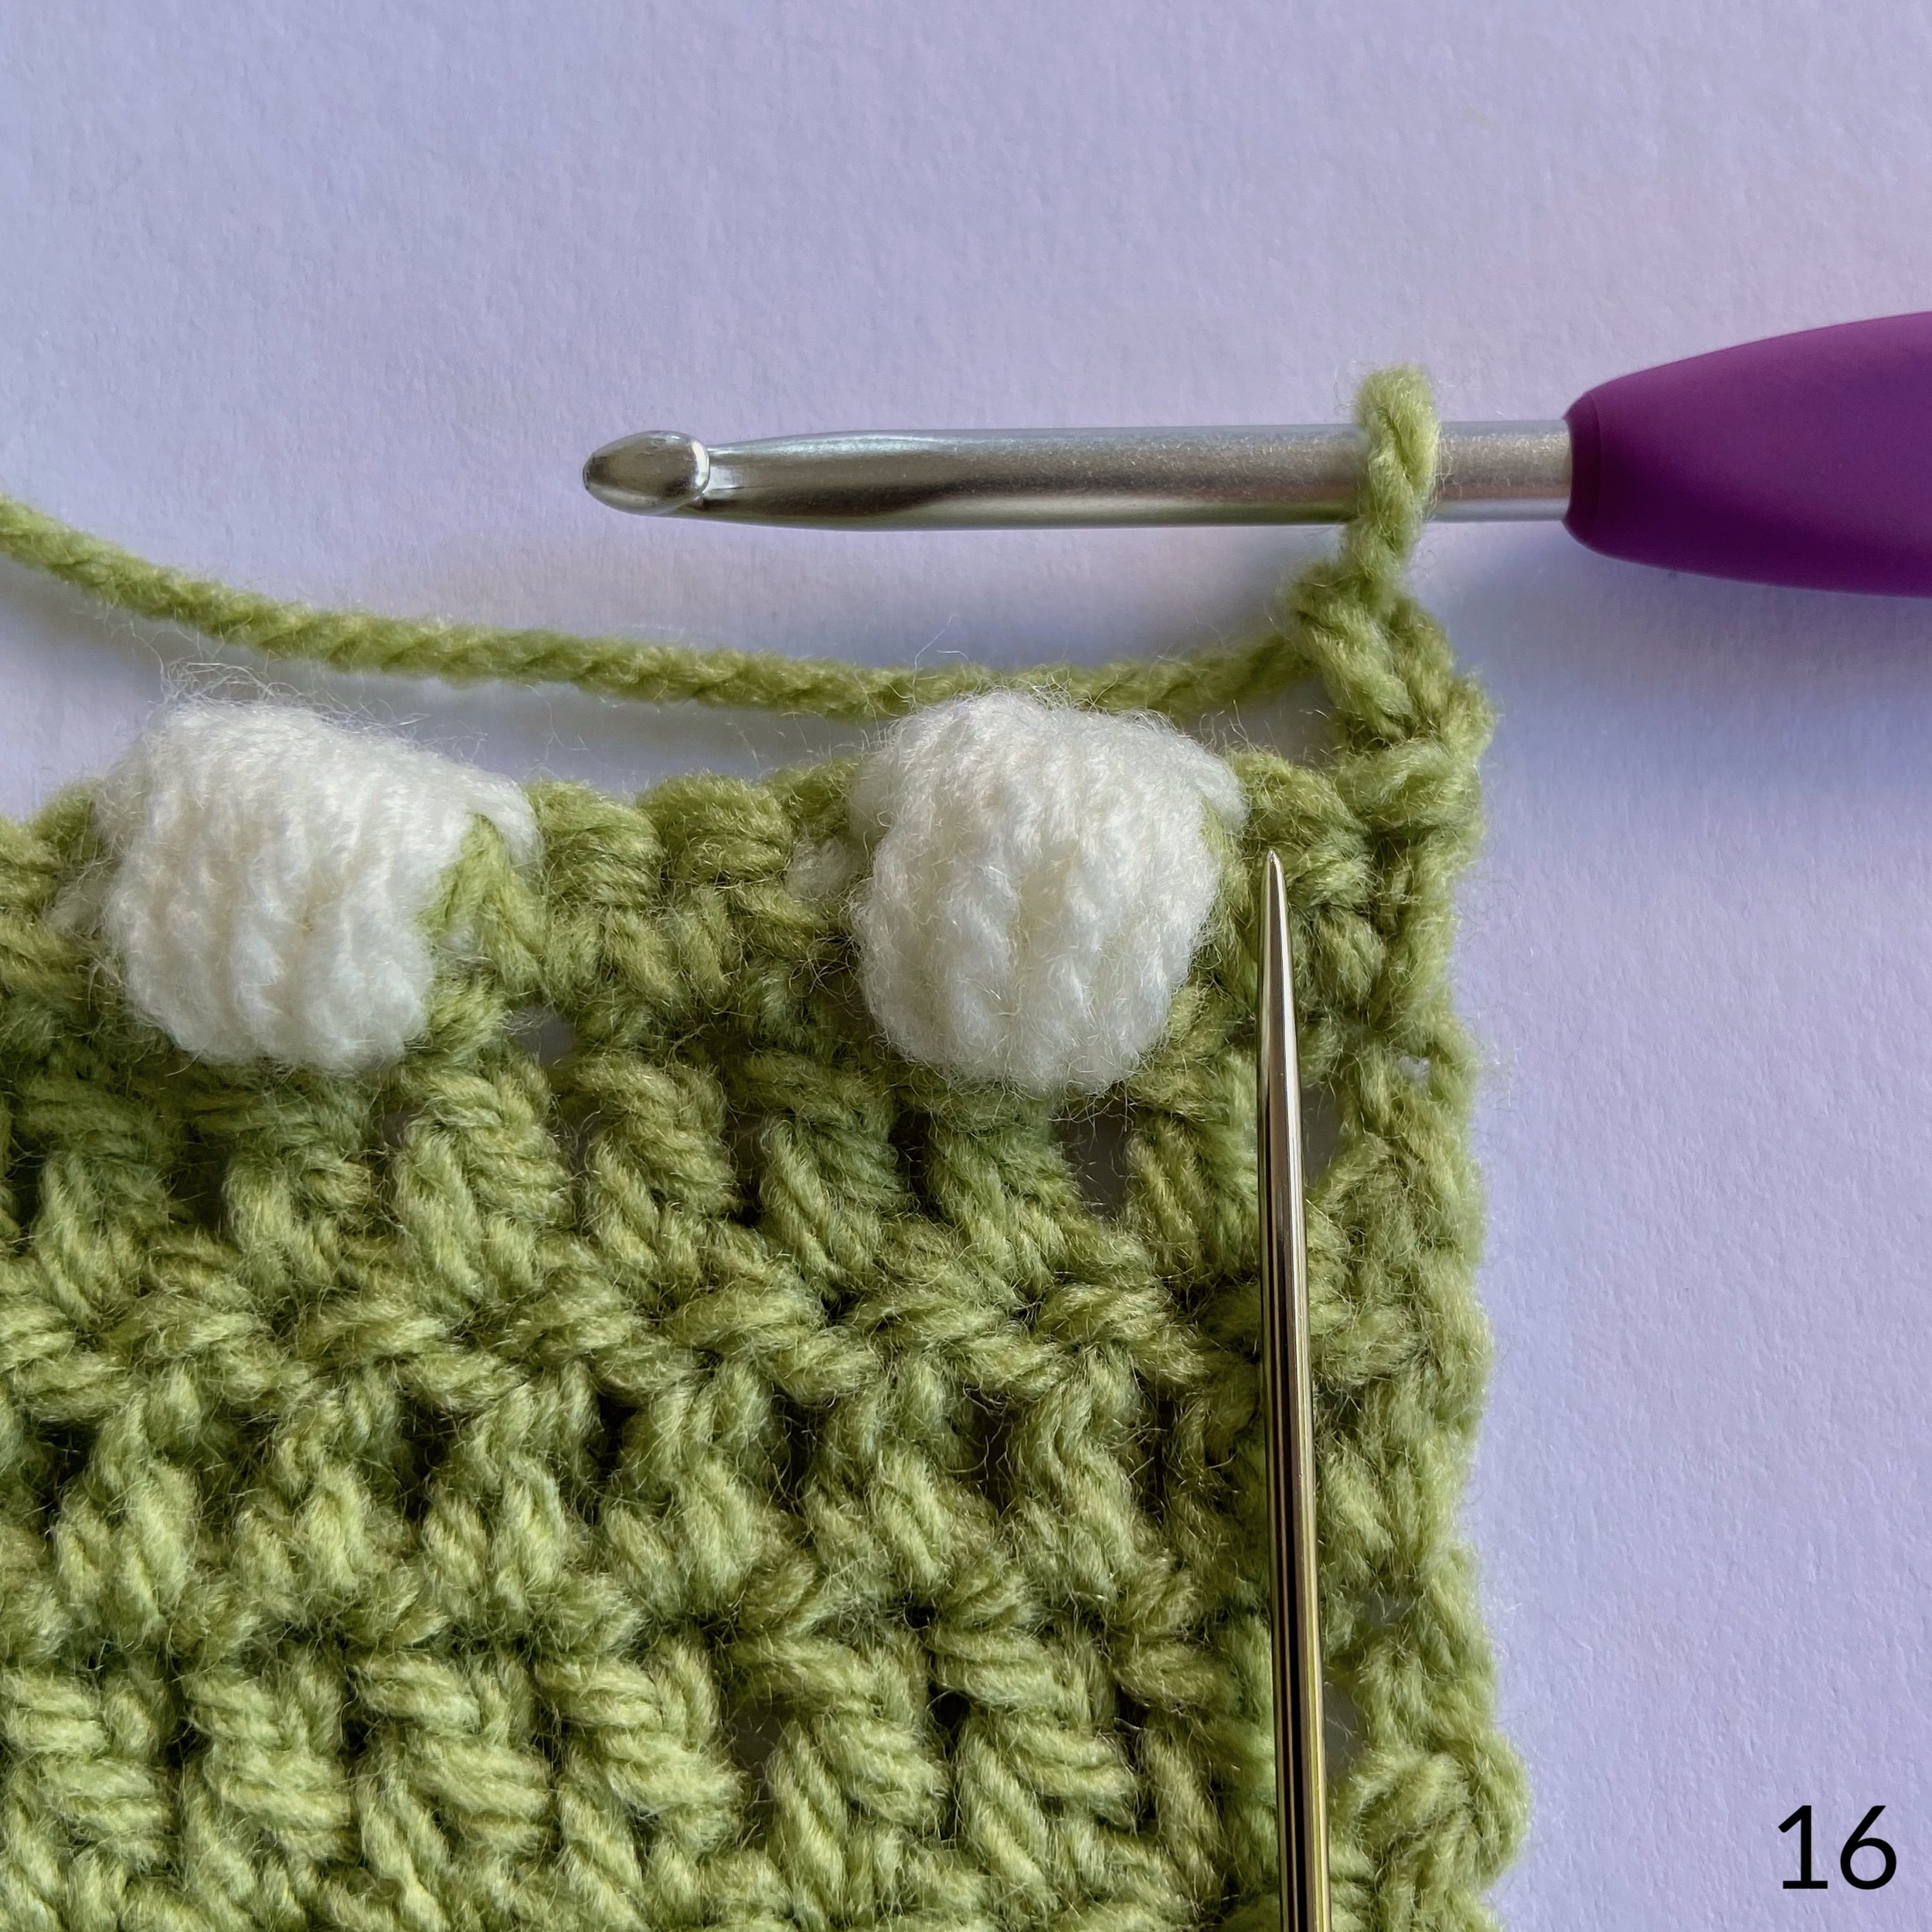


Row 6: 1 tr in each stitch across. 2 ch, turn. 150 sts.
16. Remember that the 2 ch always counts as the first stitch. Skip the first stitch and place your first tr where the needle is pointing.
17. Your next stitch goes in the top of the bobble.
18. 1 tr in each stitch across.
Row 7: Sk the first st and 1 tr in each st across. 2 ch, turn.
Row 8: Repeat row 7.
Row 9: Sk the first st and 1 tr in each st across. Change to B, 2 ch, turn.
To change colours at the beginning of a row, simply pull through a loop of the new colour in the last yarn over of the last stitch. Here I am pulling a loop of cream through the green. Leave tails of about 15cm to sew in later.
If the pattern says to change to a new colour, you can cut the previous yarn.
Row 10: Sk the first st and 1 tr in each st across. 2 ch, turn.
Row 11: Sk the first st and 1 tr in each st across. Change to A, 2 ch, turn.
Row 12:Sk the first st and 1 tr in each st across. Change to B, 2 ch, turn.

The next section appears regularly throughout the blanket, and I’ve called it the Candy Cane stripe. It consists of 3 rows and will always be worked in the same way.
Row 13: Sk the first st and 1 htr in each st across. Change to C, 3 ch, turn.
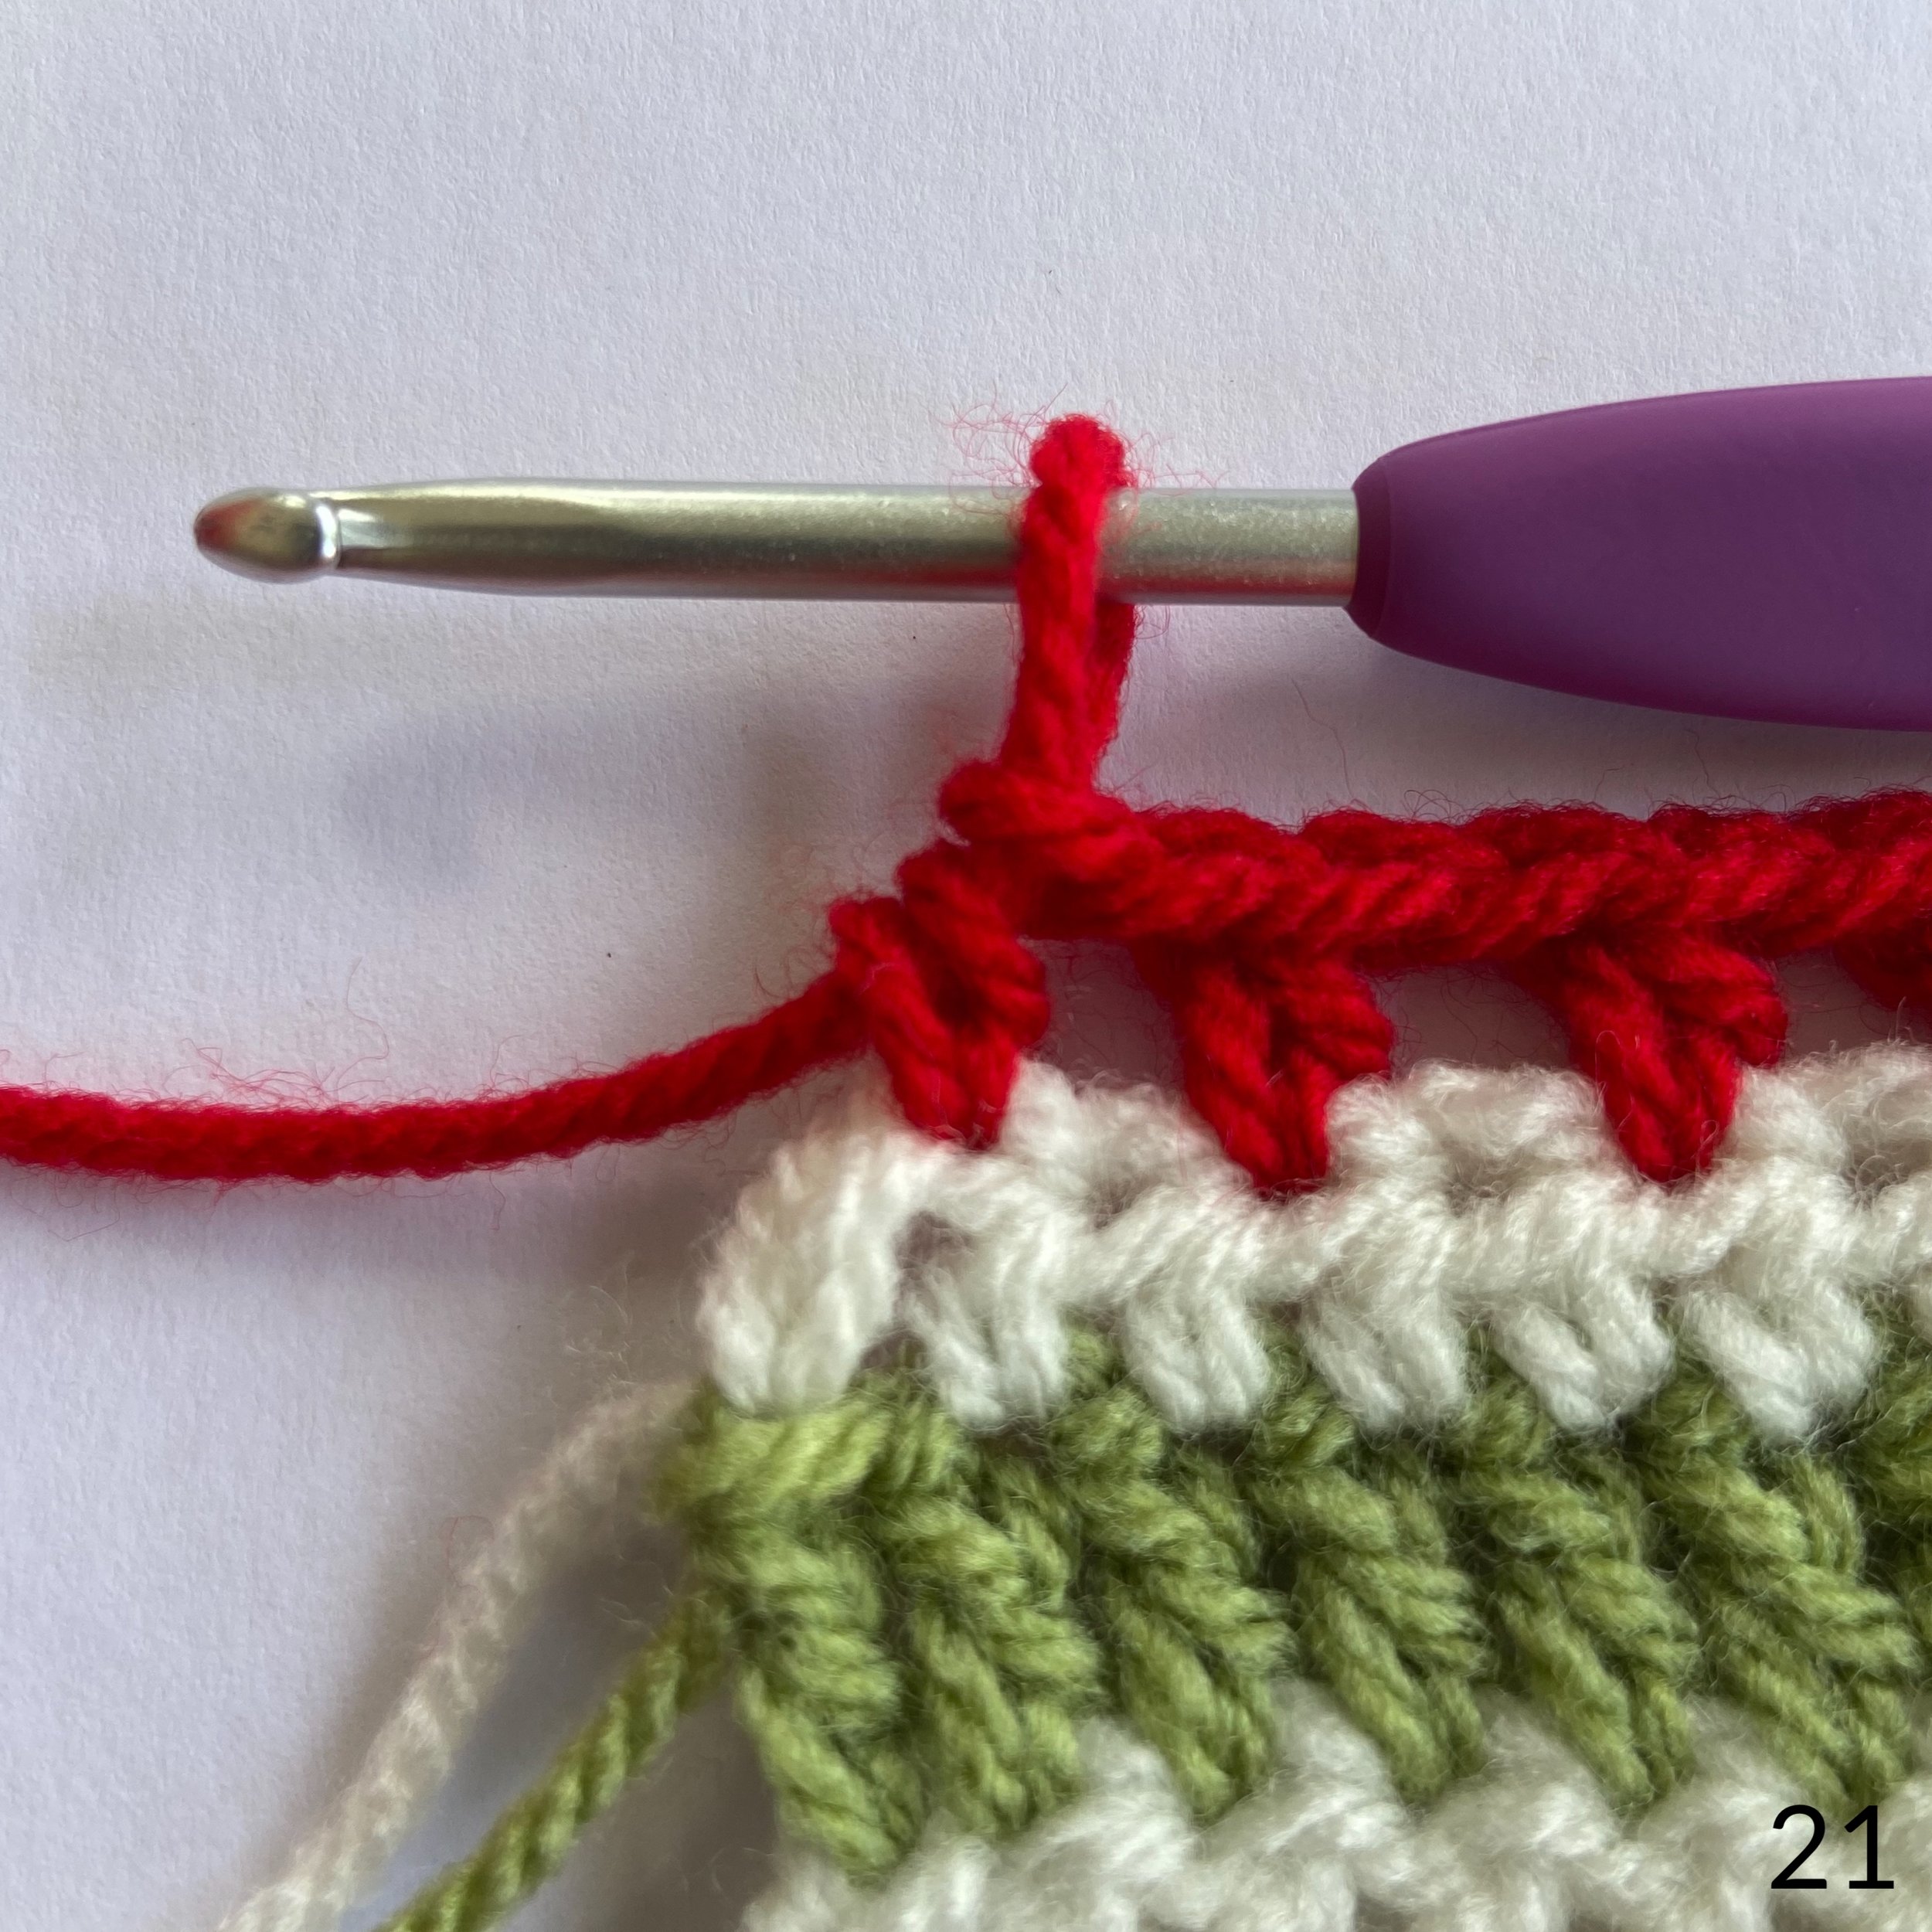
Row 14: (3 ch counts as 1 htr and 1 ch). Sk 2 sts and 1 htr in the next st, 1 ch. [Sk 1 st, 1 htr in next st, 1 ch] until 1 st remains. Join B in last st and 2 ch, turn.
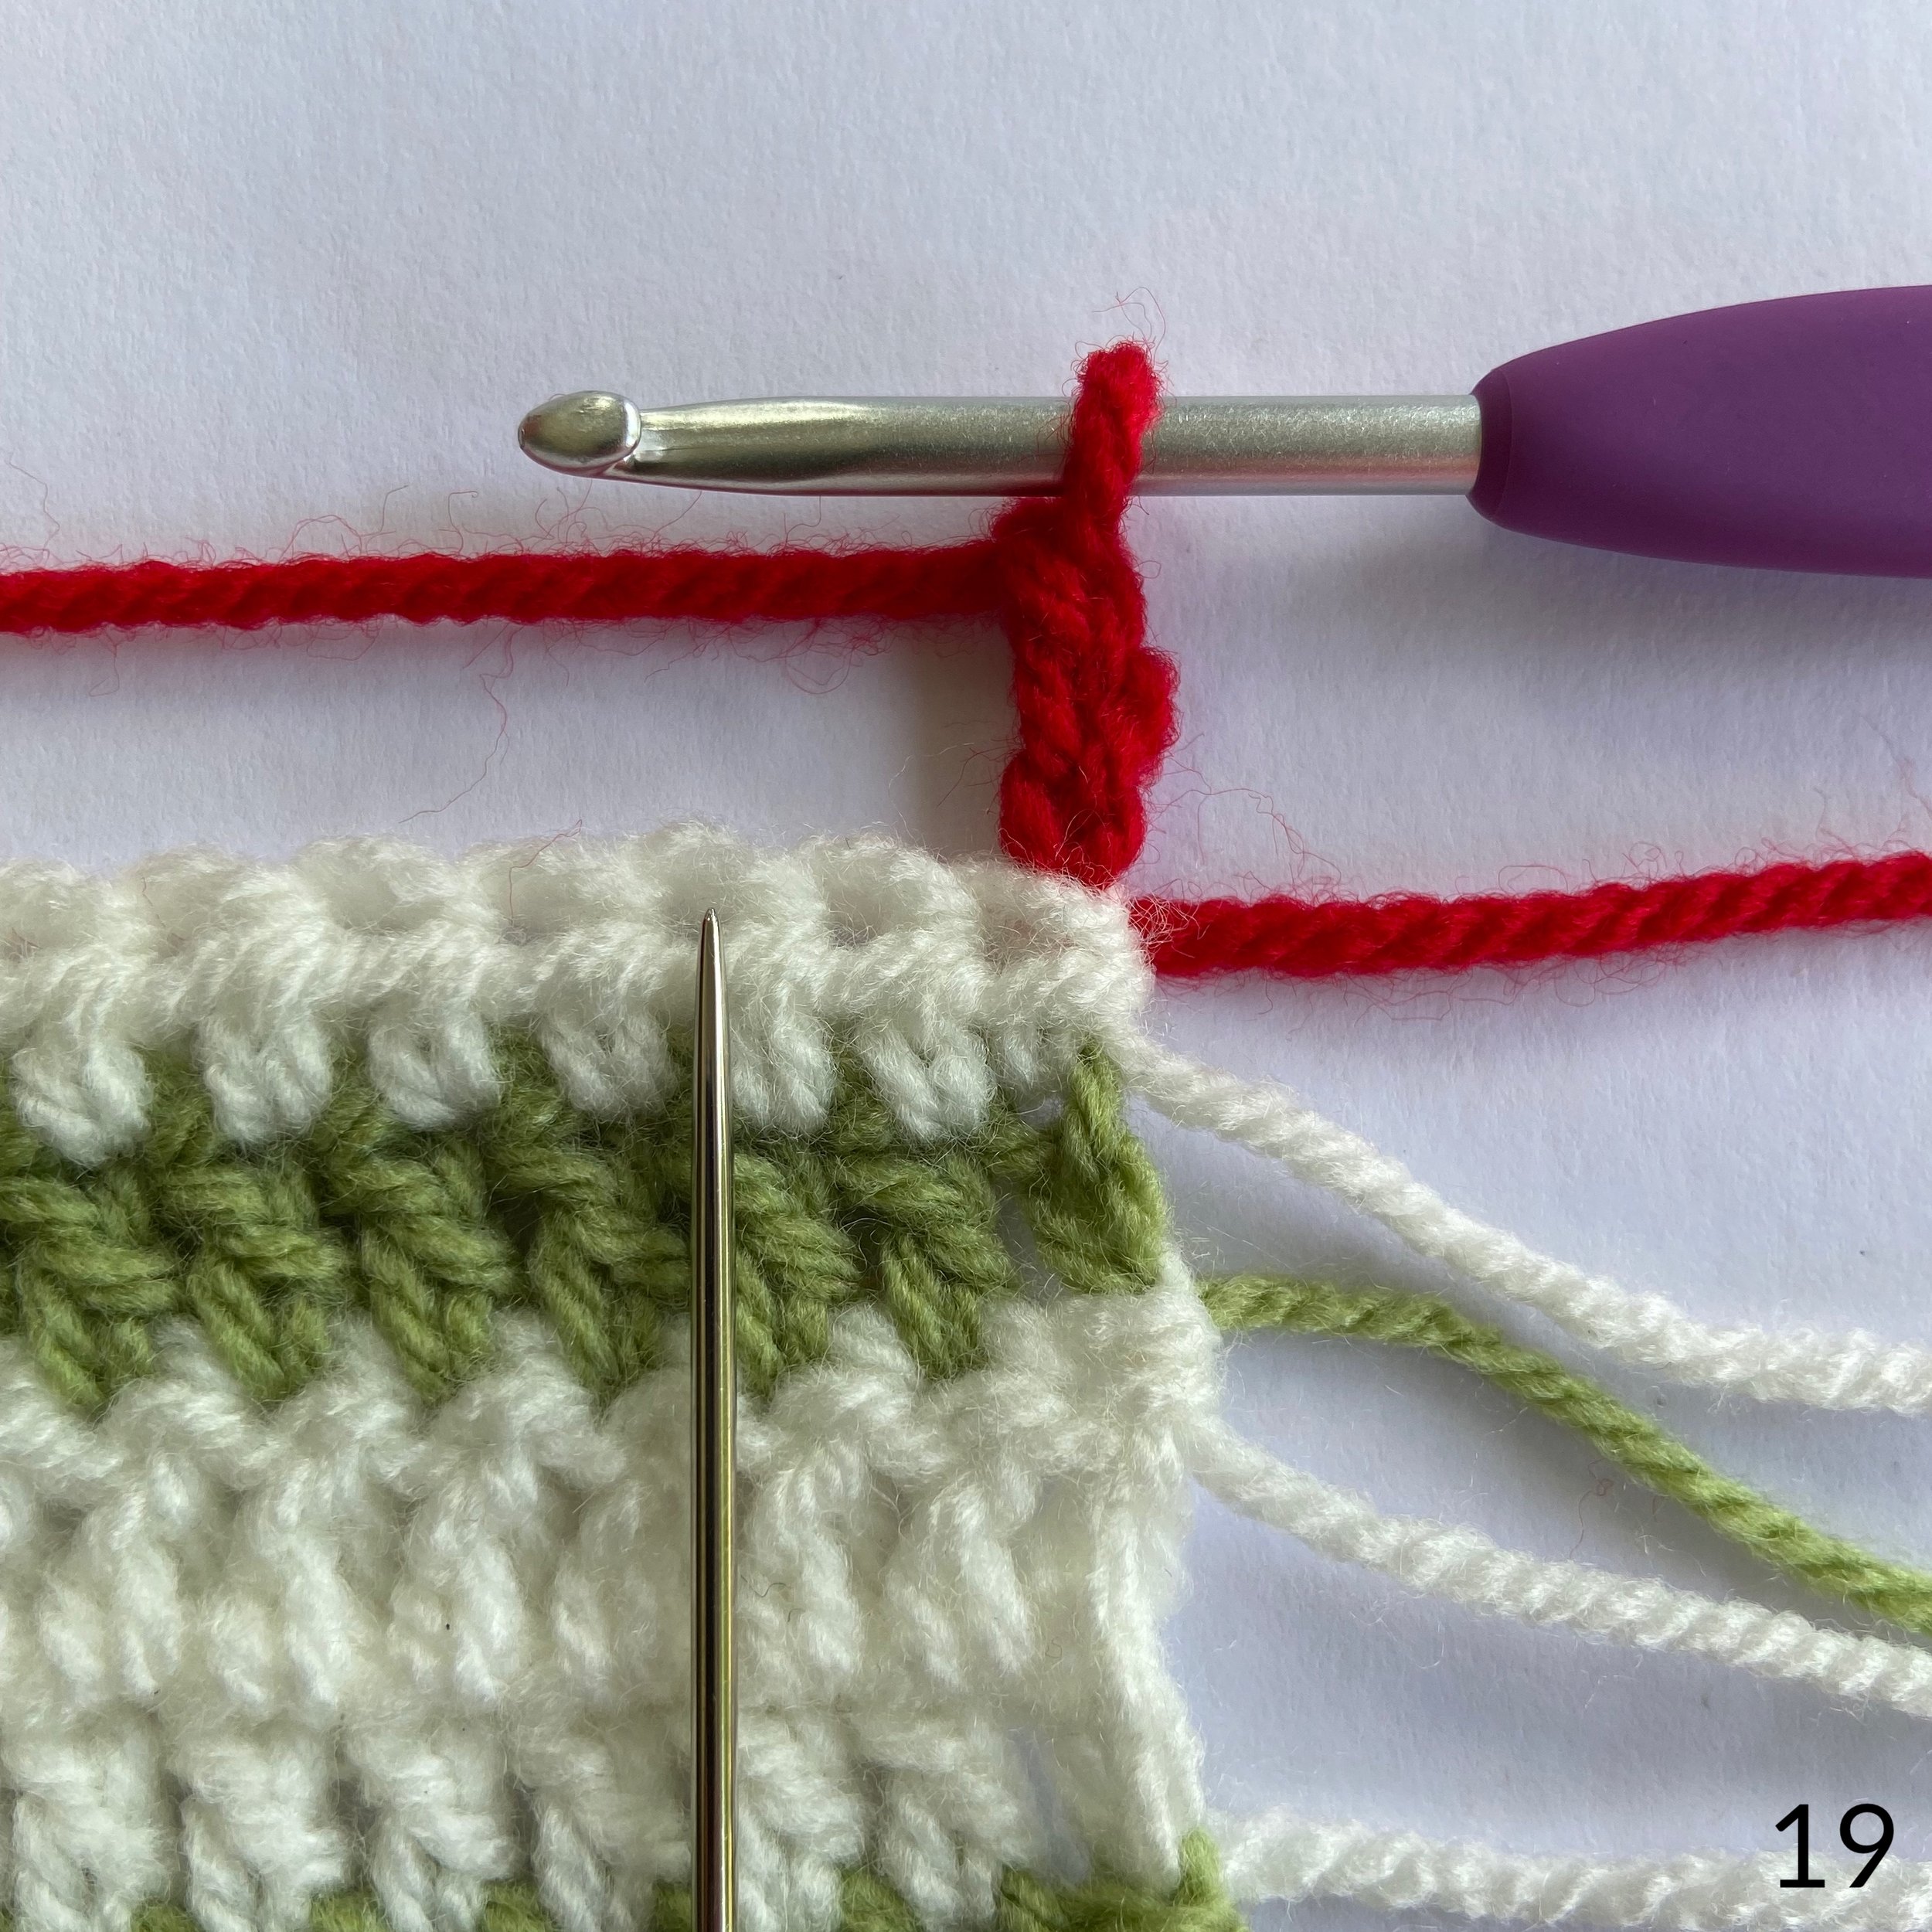


19 & 20. The needle shows you where the first htr of row 14 goes.
21. When you get to the end of row 14 with 1 stitch remaining, fasten off, do not turn.
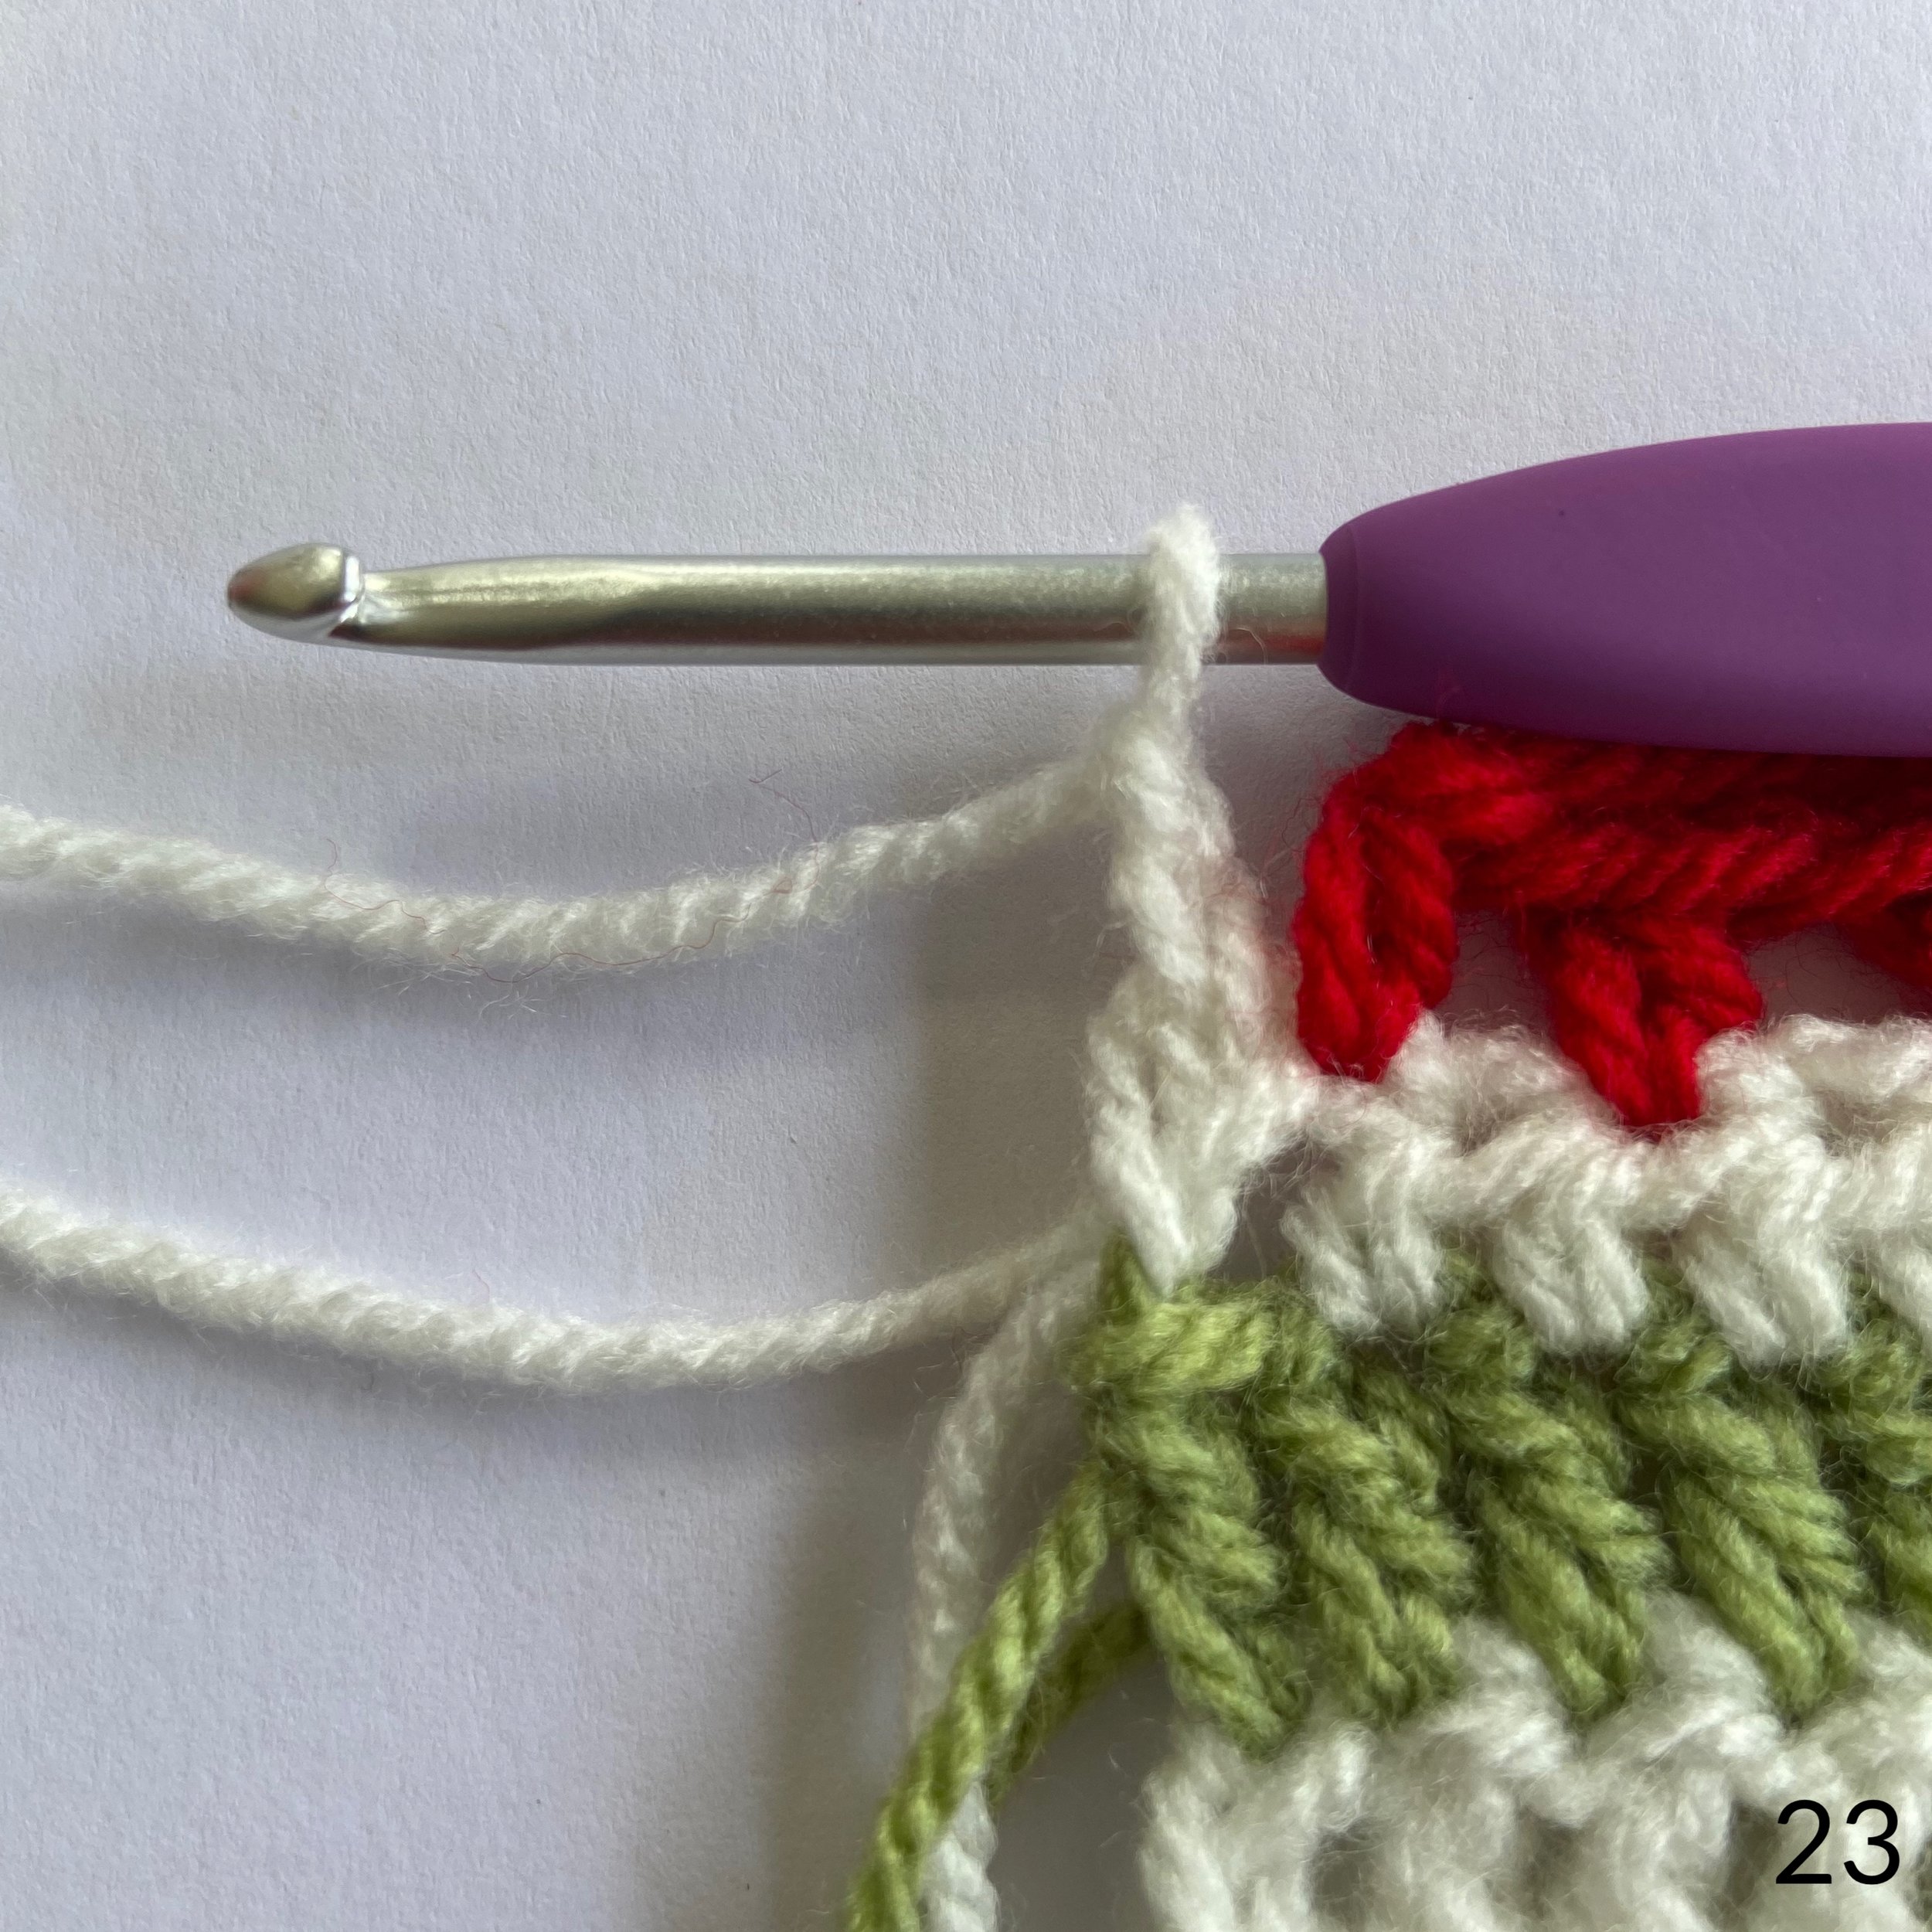
22. Join B in the remaining stitch. The needle shows you where.
23. 2 ch, turn.
Row 15: [1 htr, 1 tr in row below] until 1 st remains. 1 htr in last st and fasten off.


24 & 25. 1 htr in the first yarn C htr. The needle shows you where.
26. 1 tr in the skipped htr in row 13.
27. Repeat 1 htr, 1 tr in the row below until there is 1 st left. 1 htr in the last st and fasten off.
Now is a good time to sew in your ends to save a big job when you have finished.
Sewing in ends


1. On the wrong side, thread your needle under a few stitches, taking care that it cannot be seen on the front. I have done this in the bottom of the row above where the cream can’t be seen against the green. Make sure you don’t pull too tight and distort the edge of your work.
2. Catch the needle under a stitch, again taking care that it can’t be seen on the front.
3. Thread the needle back the other way under a few stitches and pull through. Snip off the excess.
Here is the link to take you to the video on YouTube. There are timestamps in the YouTube video description box to help you find the part of the video you need.
The video has subtitles and you can translate them into different languages.